
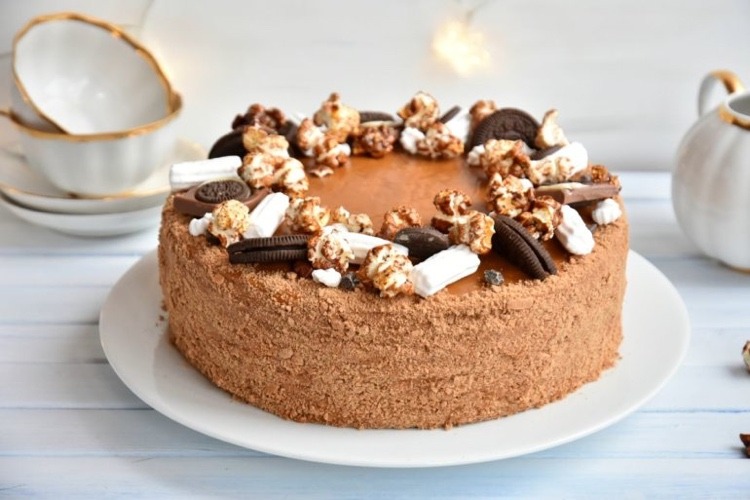
You can make a Medovik cake with condensed milk cream and interesting decorations yourself
The Medovik cake, still known as the Russian honey cake, not only looks good, it also scores with a lot of taste and aroma. It is often baked at Christmas time, but is also ideal for other occasions such as a birthday. Today we introduce you to two recipes that you absolutely have to try!
Medovik cake with chocolate flavor
Calories per 100 grams: 368 Kcal / preparation time: 2 hours / level of difficulty: medium
Ingredients for a cake for 8 people
For the dough:
150 g honey
150 grams of sugar
3 Eggs
600 g of flour
30 g cocoa powder
150 Butter
1 TL Backsoda
For the cream:
500 g sour cream with a high fat content, at least 30%
1 can of sweetened condensed milk (milkmaid)

– Beat the sugar and eggs with the whisk until frothy.
– Melt the butter in the microwave over low heat and then let it cool completely. Then add the butter to the egg-sugar mixture.
– Melt the honey in a saucepan over low heat so that it does not boil. Add the baking soda to the honey and stir vigorously with a whisk. * A lot of foam forms, so it is desirable to use a high-walled saucepan.
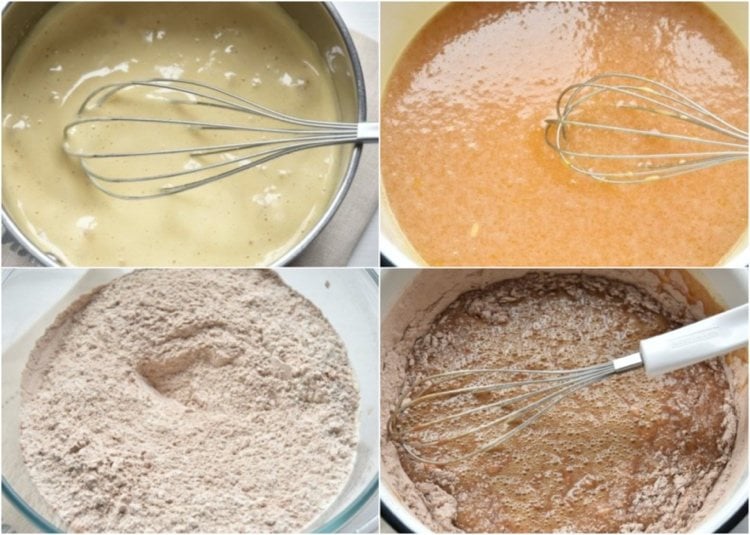
– Add the honey foam in small portions to the mixture of eggs, sugar and butter and stir with a whisk.
– Mix the flour with the cocoa powder and sieve through a sieve.
– Add the flour mixture to the liquid ingredients.

– Knead the dough, shape it into a large ball and put it in the refrigerator for 30 minutes.
– Then divide the dough into 15 pieces. (One of the cake bases is made into crumbs and used for decoration.)
– Roll out the individual balls 2-3 mm thick. It is best to do this directly on a lightly floured parchment paper. While one layer of dough is being baked, the next is being rolled out. Use a template, saucepan lid, or plate to cut evenly sized circles out of the dough. Carefully remove the remnants of the pastry and prick several times with a fork.
– Bake all layers of dough in a preheated oven at 170 degrees air circulation for 5-6 minutes until golden brown.
– Put the finished cake bases in a stack on top of each other and let them stand until they have cooled down completely.

– To make the caramel cream, you can use a simple trick: the can of sweetened condensed milk is boiled unopened in a pot of water for 2 hours. To prevent the can from rattling, place 2-3 pieces of baking paper in the pot. The longer you cook them, the thicker the consistency and the richer the taste.
– Do not open the cans until they have completely cooled down in the water.
– Put the cooked dulce de leche in a blender and stir until smooth. Then add the sour cream and mix to a smooth mass.

To assemble the cake, first put a teaspoon of cream on the cake plate. Then place the first cake base on top and spread 2-3 tablespoons of cream on top. Put on additional shelves in the same way until the Medovik is assembled. Chill the cake for 6-8 hours so that the cream softens the cake bases a little.
Finally, coat the top and sides of the cake with the cream and decorate with crumbs. The choice of how you decorate the cake is up to you.
Medovik cake for the lazy
Even if the original recipe is pretty simple, it takes a long time to prepare. Here is a good alternative for everyone who is in the mood for a Medovik cake but doesn’t have long time to bake individual cake bases.
Ingredients for the dough (original recipe):
480 g flour
230 grams of sugar
4 tbsp honey
4 Eggs
1 teaspoon Baking powder
Ingredients for the cream:
300 g sour cream
250 grams of sugar
250 g Quark
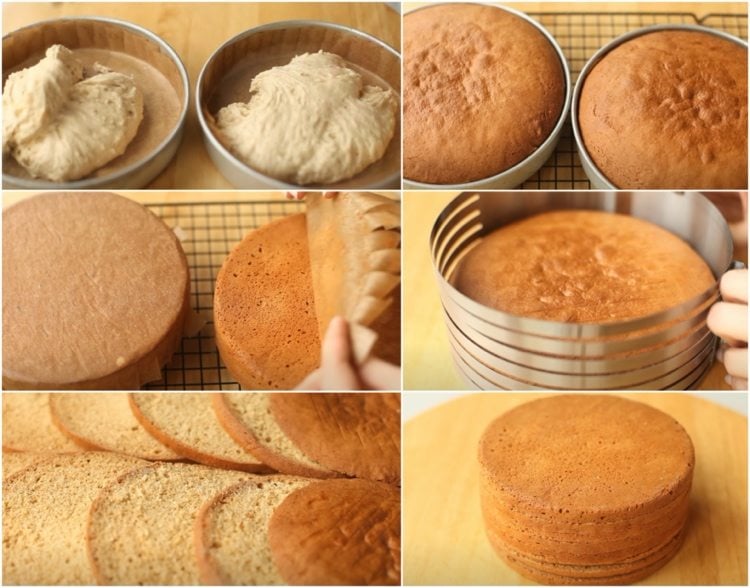
Beat the eggs with the sugar until frothy, then add the honey and mix to a creamy mass. Mix the sifted flour with baking powder and add to the egg mixture, stir with a spatula.
Divide the dough into 2 baking tins (about 18-20 cm in diameter) and bake in a preheated oven at 180 ° C for 25 minutes. As soon as the cakes are completely cooled, use a cutting aid to cut 8 cake bases of the same thickness.
And here is a nice idea for matching decoration
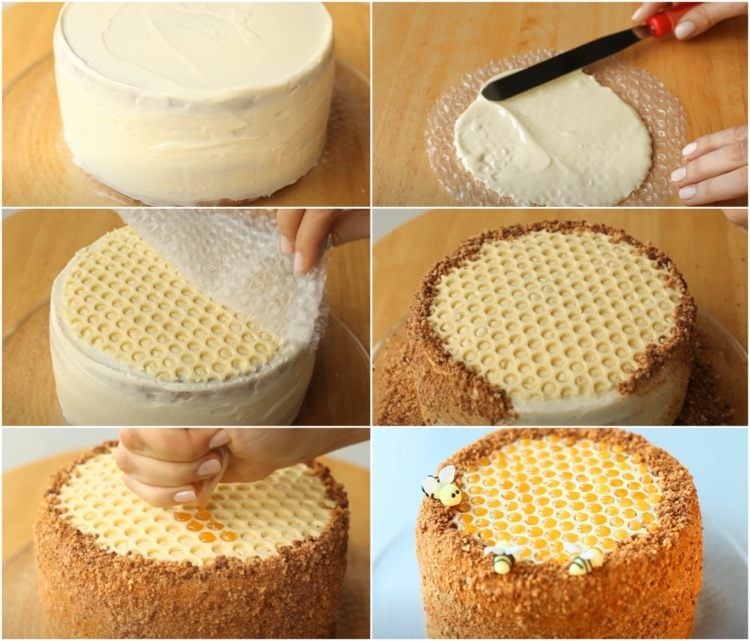
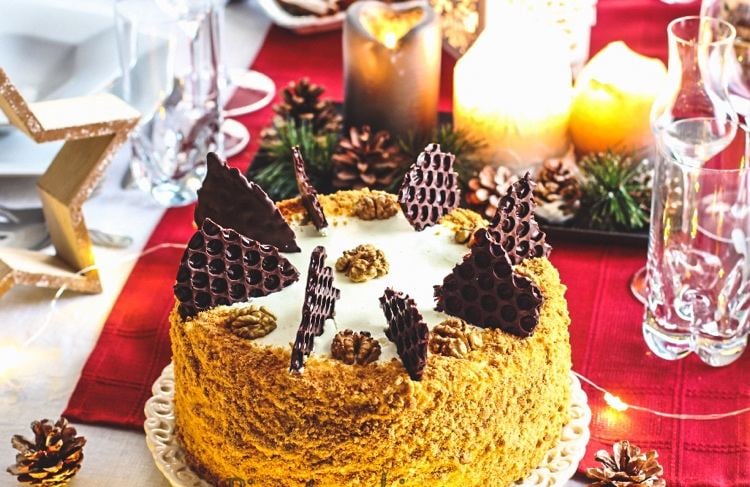
We usually associate the honey taste of the Medovik cake with bees. For this reason, a honeycomb made of white chocolate would be the perfect cake decoration! Here’s how you can do the decoration:
- Cut out a circle of bubble wrap with the same circumference as the cake and then spread it out on the work surface.
- Melt the white chocolate in the microwave or on a water bath and use a spatula to spread it on the bubble wrap. Then place the bubble wrap with the coated side on the cake and press it on. Chill for 2 hours.
For the wings, stick two almond flakes in the back of the bees

- Carefully remove the bubble wrap. Cover the Medovik cake with the breading on all sides.
- Pour liquid honey into a piping bag and fill the individual honeycombs. If desired, round off the whole thing with a few bees made of fondant.
Medovik cake with winter charm
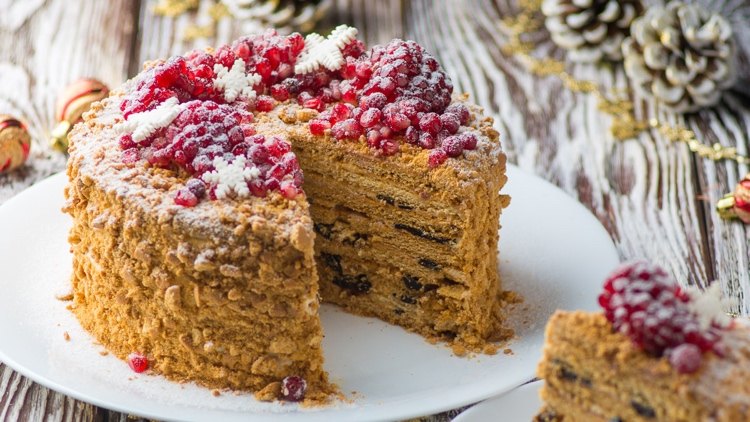
This wonderfully fragrant honey cake would be a real eye-catcher on the Christmas table. The caramel and sour cream cream can be refined with prunes. For a wintry flair, you can decorate the cake with red pomegranate seeds and lingonberries and dust it with powdered sugar.
With fresh berries, the cake also looks great and is refreshing

Number cake from Medovik cake bases
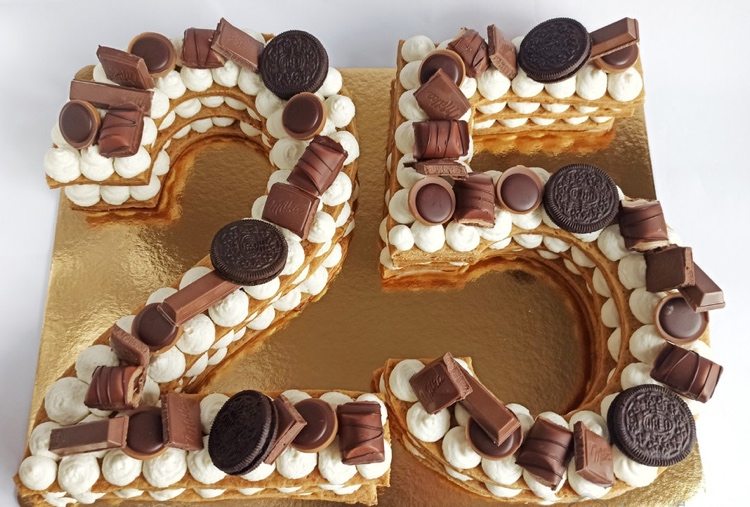
Number cakes are enjoying growing popularity and are perfect as birthday cakes. They can be wonderfully decorated with sweets, cookies, fruits and macarons.
The post How you can make a Medovik cake with condensed milk cream and interesting decoration yourself appeared first on Deavita.com | Home ideas, design, hairstyles, make-up, lifestyle, health and beauty tips.


