Make DIY gift box yourself
 With gifts we can show our appreciation to other people, be it for a birthday or Christmas. The more personal the gift, the more likely it will be well received by the recipient. With a self-made gift box you can give your loved ones even more joy. It is also a good alternative if you don't have wrapping paper in the house.
1, For a crafted gift box you need a A4 cardboard box. This should be as stable as possible so that your box cannot tear or dent quickly. You can determine the color individually. We chose white so that you can better understand the folding. Here you will find paper for packaging and handicrafts.
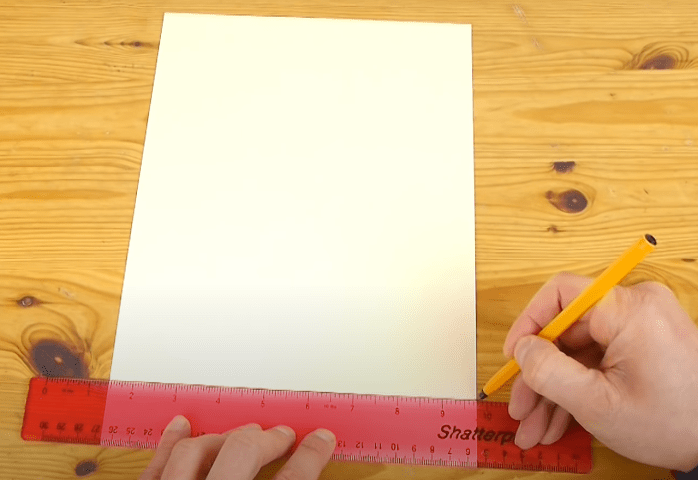
2, With a ruler you now draw a line at the bottom of your sheet with a pencil. We took the distance of the ruler. You can make the distance to the edge of the sheet smaller or larger, depending on how high your box should be. Be careful not to make the distance too large, otherwise you won't be able to fold the box later. It is best to adjust the height of the box to the gift that you want to give away with the box.
3, Now you turn the paper clockwise and do the same at the top of the page. Then you fold the sheet inwards on these sides so that the tabs are up. That will be the walls of the box later.
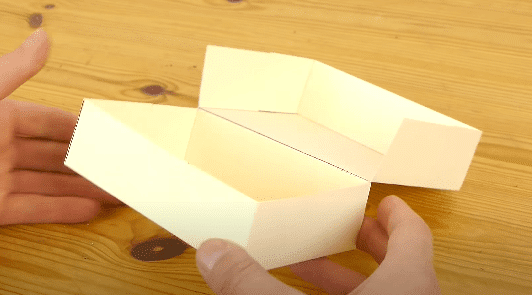
4th 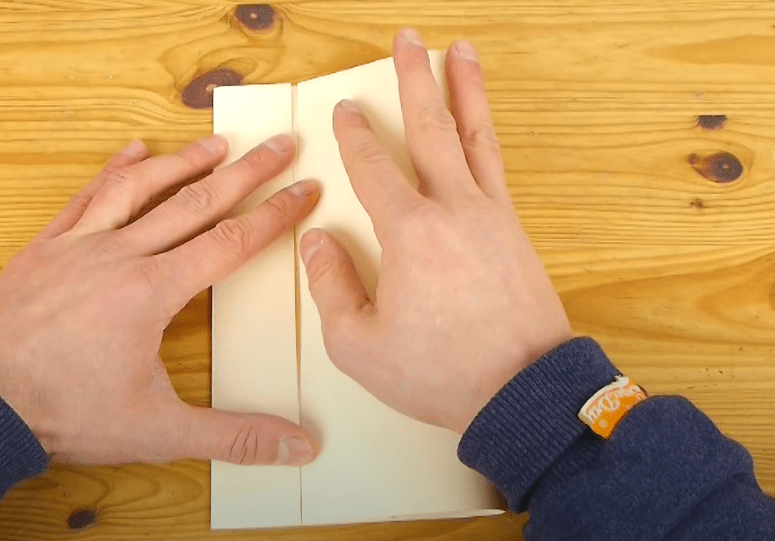 Then you fold one side to the end of the other side. When folded, the sheet is now roughly the size of an envelope. Then you open the just folded edge and fold the sheet as before but now on the other side. You should now have two edges in the middle of your sheet. You can see this when you unfold the sheet completely again.
5. Now you unfold the sheet completely and paint a line like at the beginning on the vertical side of your sheet. You do that on both sides. You can also trace the newly folded center lines, but this is only advisable on the first try, as you will see the lines later in the box. However, it helps to understand how to fold the box.
6,
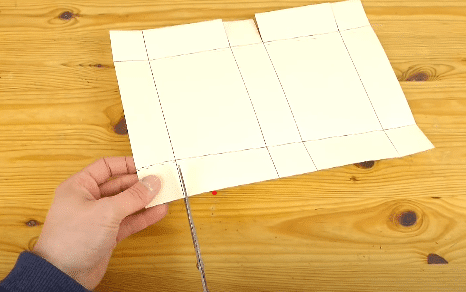
Now use scissors to cut the horizontal lines up to the vertical line. You do not cut the lines on the horizontal side of the sheet. These are later folded over so that the box has stable walls that hold.
7,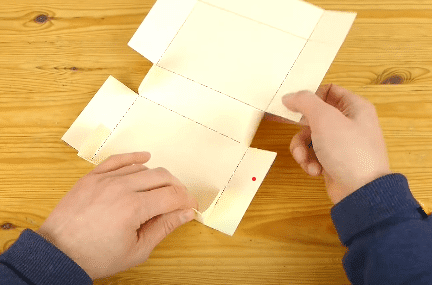 Then you fold the just cut smaller tabs inwards and glue them carefully to the long tabs so that the tabs can stand upright. These are the walls of the box. You do the same with the lid of the box. The folded center lines are now the connection piece to the lid of the box.
8, Optionally you can attach clips to the sides so that the sides remain stable while the glue dries. Paper clips are suitable for this or as soon as the glue is dry you can remove the clips again.
9, The gift box is now ready and can be filled. Small gifts such as jewelry or cosmetics in particular fit well in the box. Vouchers are also suitable for this. The box is also good packaging for money. At the same time, you save money with the box because wrapping paper is more expensive than the box for the box.
To make the gift box look even more beautiful, you can use cardboard that has different patterns on both sides. It looks as if the gift box is lined on the inside and appears to be of higher quality. If you want to fold a larger gift box, you can use a Din A3 box instead of a A4 box. The folding remains the same. The DIY is quick and easy and will still have a big impact. Just try it!
The post DIY DIY gift box appeared first on DIYDEKOIDEEN | diy ideas – deco – craft ideas – gifts – decoration.


")


