How to dye eggs with patterns – 9 ideas with instructions for unique Easter eggs
If you don't just want to design simple, single-colored Easter eggs, you can decorate yourself with a variety of patterns. There are many techniques for this, some of which we would like to introduce to you today. It is up to you whether you draw the patterns on the eggs by hand or transfer finished ones with fabrics and paper directly. Because if you dye eggs with a pattern, anything you like is allowed! You can either dye the Easter egg in special colors for this purpose, in food colors, or use different types of vegetables, which you can use to dye the Easter eggs naturally.
Color eggs with pattern – Abstract pattern
This technique may be known to many, but we would still like to briefly introduce you again, because not only do the finished eggs look so beautiful, they are also a good basis for one of the other pattern ideas in this article. Prepare the colors (e.g. in a disposable muffin baking sheet), provide kitchen paper and put an egg in any color.
Hold it for a while, take it out, and dab the damp paint off with kitchen paper. Then place it in a different position in the next color. So you can continue as often as you like until you like the abstract Easter egg. You can also wear gloves to avoid coloring your hands when holding them.
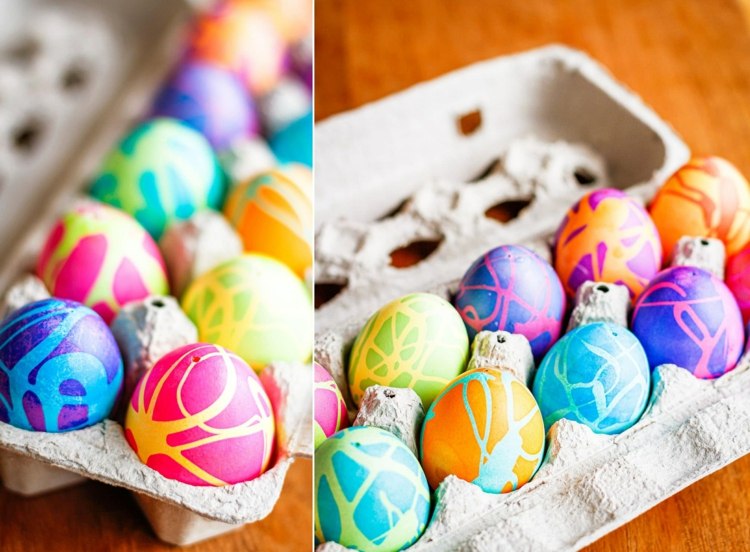
Color eggs with rubber band

The next idea is extremely easy to make. And you dye the eggs as usual, except that you first tie rubber bands (or string) around them in any way. Not only can you use different thickness ribbons, you can also wrap them around the egg in a variety of ways, so that you only get strips in the middle, for example, or anywhere on the egg.
It is also a nice idea to first color the egg in a light color and when it has dried, use the gum and then put it in a different color. If you now remove the ribbons, the first color can still be seen. Of course, more than two colors can also be combined in this way, for example by using the technique above. Just experiment a little. At Easter you can never have enough eggs.
Color eggs – transfer patterns and colors from kitchen paper
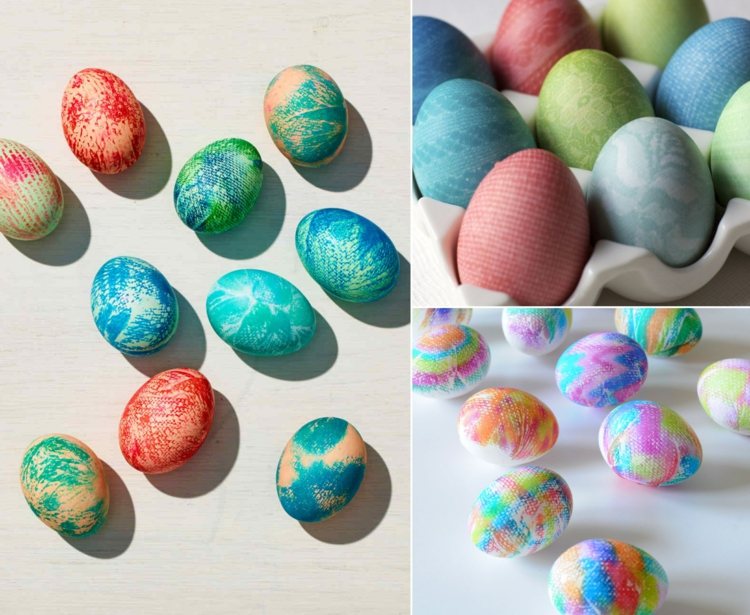
You have probably already noticed that the tiny knobs on some kitchen paper form beautiful motifs and patterns. You can take advantage of this if you dye eggs with patterns. You need:
- boiled eggs
- Kitchen paper
- Easter egg colors, food colors or natural colors
- freeze bag
- Rubber bands
- optional gloves
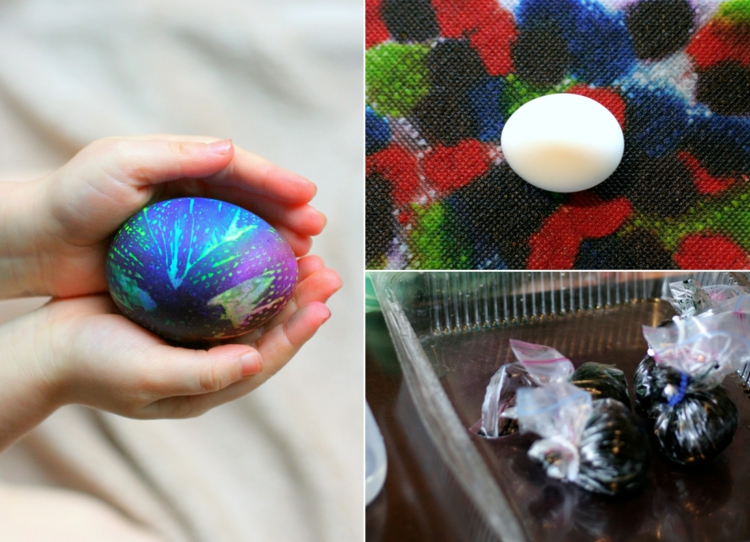
First prepare the colors as usual, put kitchen paper in a baking or baking dish and drop different colors on them. If you are satisfied with the color scheme, put on the gloves, put an egg on the paper, wrap it in it and fix everything with rubber bands. Then stow the wrapped egg in a freezer bag, which you can also tie with rubber bands. Let the color work for a few hours. Not only the colors are transferred, but also the patterns from the paper.
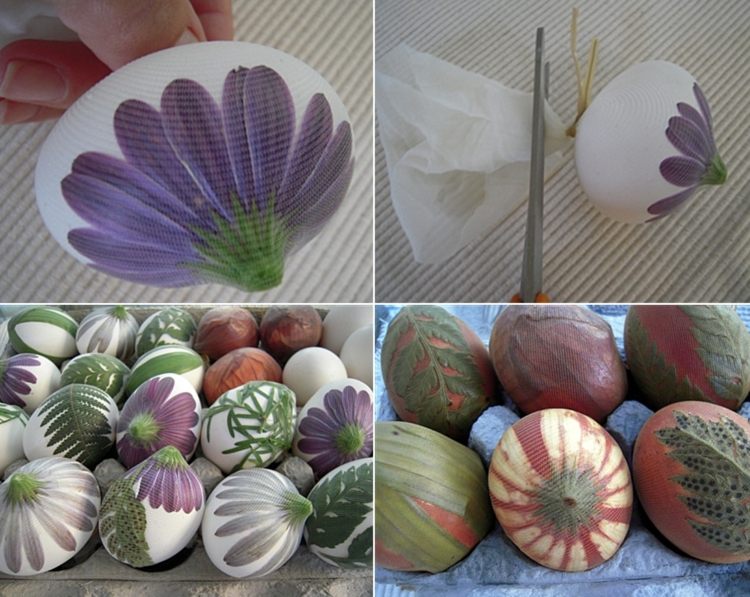
Blown out Easter eggs with patterns of silk fabric
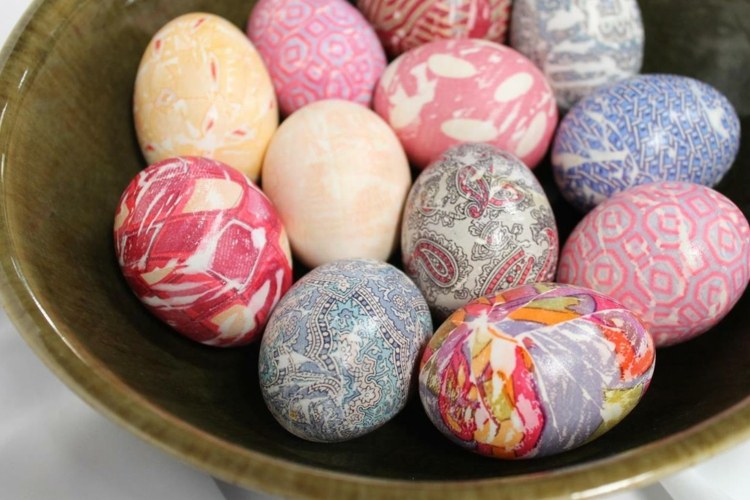
A silk scarf, an old silk blouse, a tie or remnants of silk – everything is suitable, provided it is 100% silk. You can then easily transfer the patterns and colors of the fabric onto the eggshell. This gives the Easter eggs patterns that are really unique and look professional. We explain how to dye eggs with this type of pattern and what you need:
- blown out eggs
- Silk fabric
- light cotton cloth or silk tights
- white vinegar
- Rubber bands or cord
- pot
- scissors
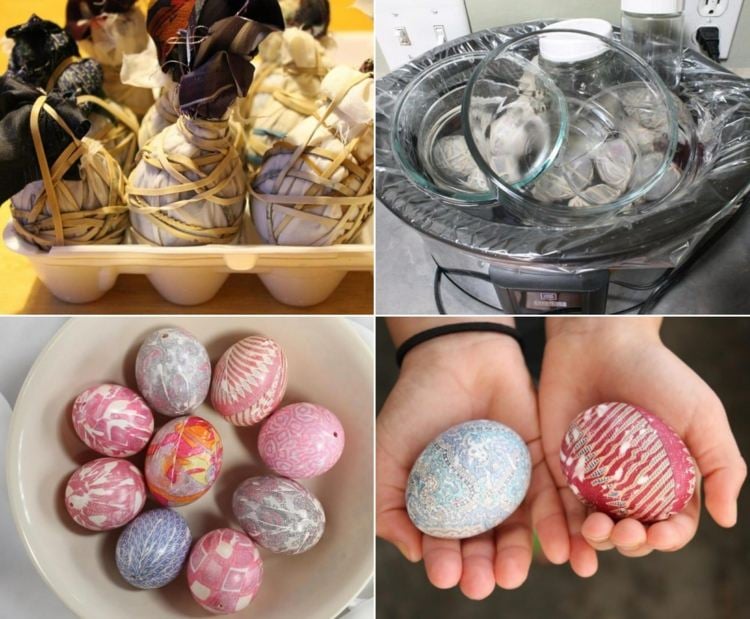
Cut the fabric into pieces large enough to wrap the egg around. Also pay attention to the pattern so that you don't accidentally cut what you want on the egg. Otherwise a 10 cm square should be sufficient. Now wrap the egg and tie the cloth tightly together (be careful not to break the eggshell). Then wrap the cotton cloth around. In this way, the silk fabric is better pressed against the egg.
Heat 5 cm of water in a saucepan and add 60 ml of vinegar. Simmer the eggs in it for 20 to 25 minutes. Because blow-out eggs float on the surface, you should either turn them frequently or cover them with a plate that pushes them down. Carefully remove the eggs from the water, let them cool and remove the fabrics.
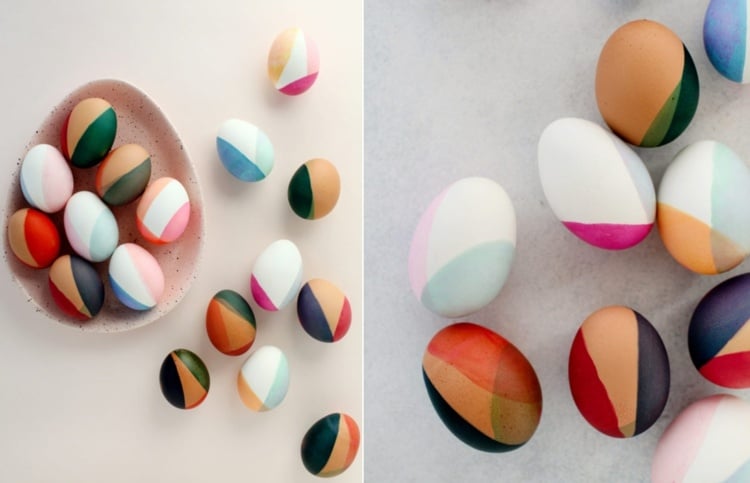
Color Easter eggs in three shades with adhesive tape

- boiled or blown eggs
- Colours
- Washitape
- scissors
Prepare the colors and place the first egg in any one for about 10 seconds. Take it out and dry it with kitchen paper. Cut squares out of the adhesive tape and stick them well on the egg (e.g. 4 rows of 3 squares each as in the picture). Place the egg again in the same color, this time for about 15 to 20 seconds, and then dry it again.
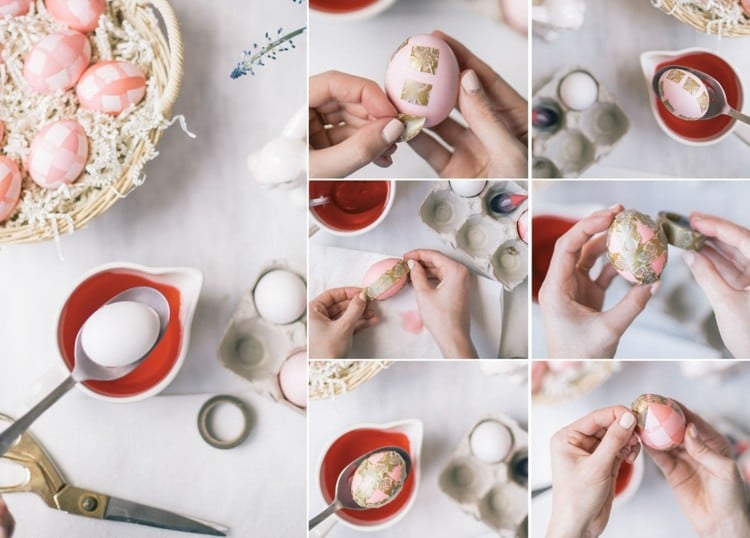
Then cut whole strips of tape and stick them along the squares. In addition, wrap another piece of ribbon around the egg so that it crosses with the others. Dye it again in the same color for 30 seconds, take it out, dry it and remove the tape. The happy eggs are ready!
Design Easter eggs with rubber putty and baking soda
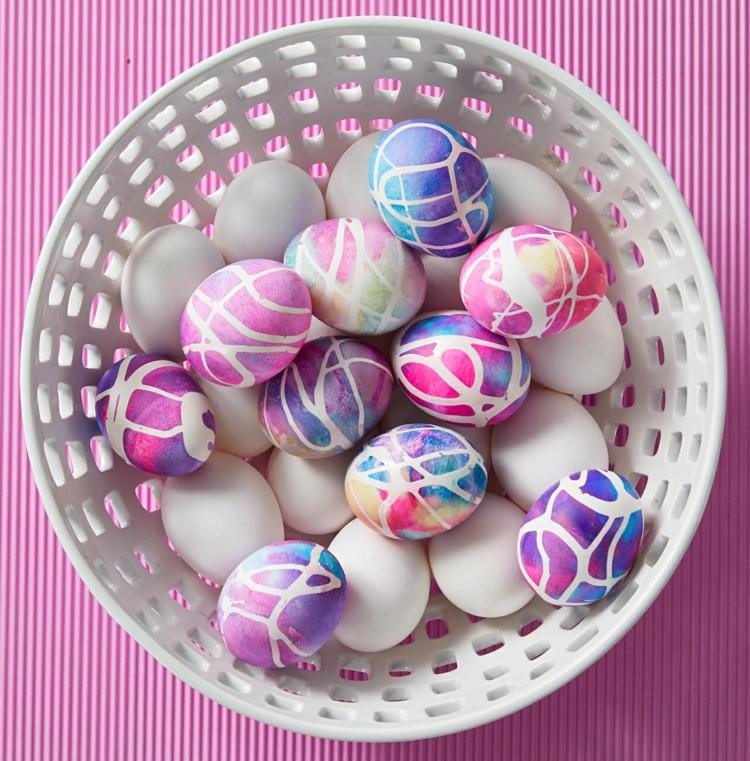
If you collect coloring techniques for Easter eggs, this with baking soda and rubber putty is also recommended. Of course, it is also possible to use only the rubber cement and any colors without baking soda. But maybe you would like to try out this variant. If you want to dye these eggs with a pattern, you need:
- boiled eggs
- Rubber putty
- Baking soda
- Muffin tray
- brush
- Gloves
- liquid food coloring
- vinegar
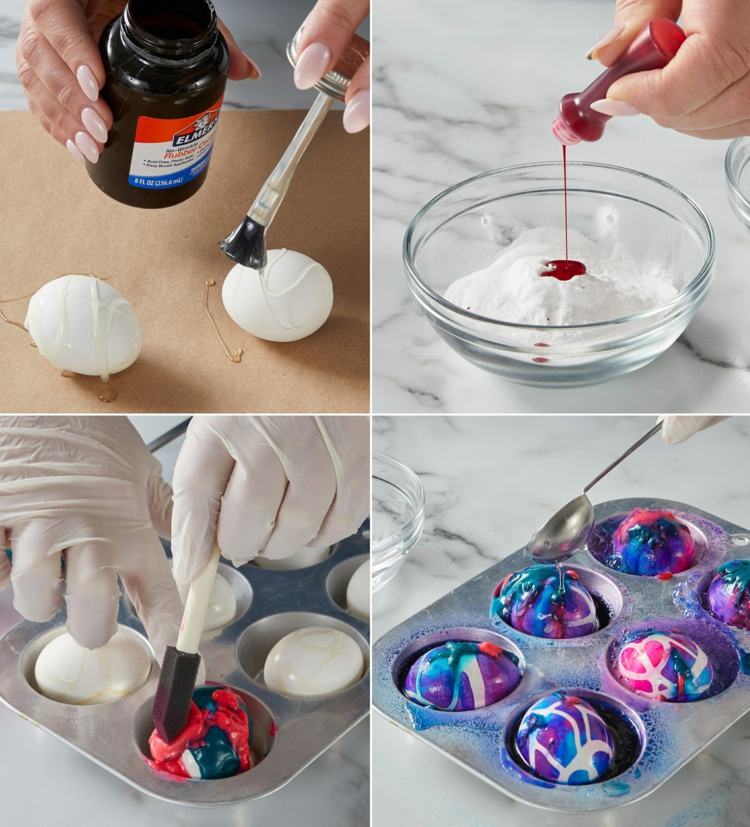
Place the eggs on a surface, dip a brush into the rubber putty and drizzle them with the eggs in any way. You can also try to paint or dab dot patterns and others with a brush. In small bowls or other suitable containers, mix 55 g of baking soda with 3 drops of color and mix the two well together.
Now place an egg in each muffin tin and spread the colors of the baking soda on the eggs with a brush and gloves. If necessary, you can then drop a few drops of paint directly onto the egg here and there. With a tablespoon, gradually pour the vinegar over the eggs. This creates a reaction with the baking soda, in which everything foams up a little. Then wash the eggs in clean water and remove the rubber putty.
Create a spotty pattern with rice
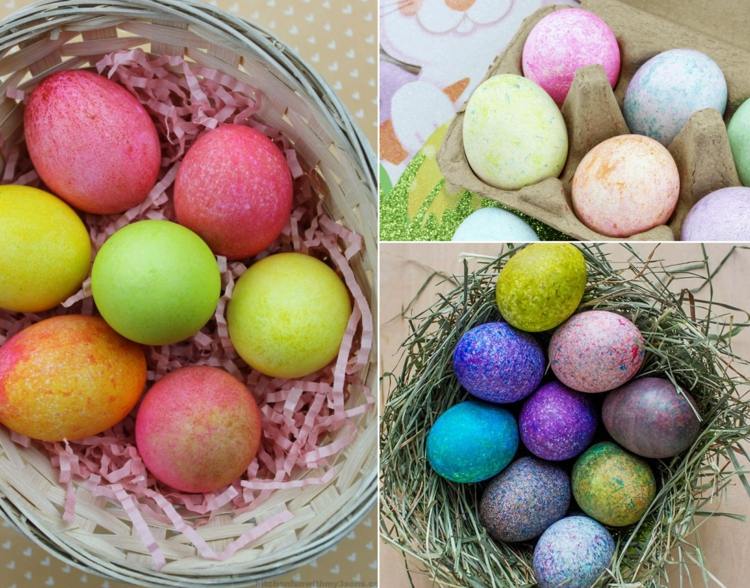
Honestly, would you have come up with this idea yourself? It is a very simple technique and you probably already have the necessary materials at home. If you want to dye eggs in this way with patterns, put rice in a sealable freezer bag and then a few drops of food coloring (about 7 to 8 drops for 200 g rice). Seal the bag and mix well together by kneading to color the rice (or with a spoon).
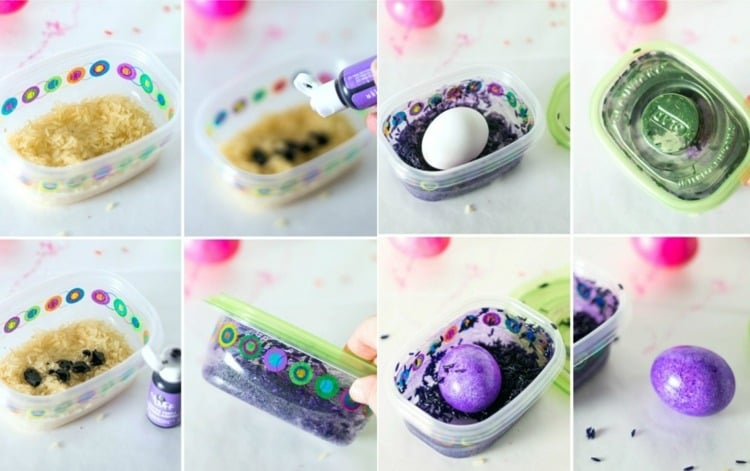
Then put eggs in the bags, close them again and turn and gently turn them inside until they are colored. This creates a pretty irregular pattern. Then you can give each egg another color for multi-colored designs or you can leave it at one color.
Tip: Instead of freezer bags, you can also use other types of closable containers or plastic cups.
Fantastically beautiful flowers as a pattern for Easter eggs
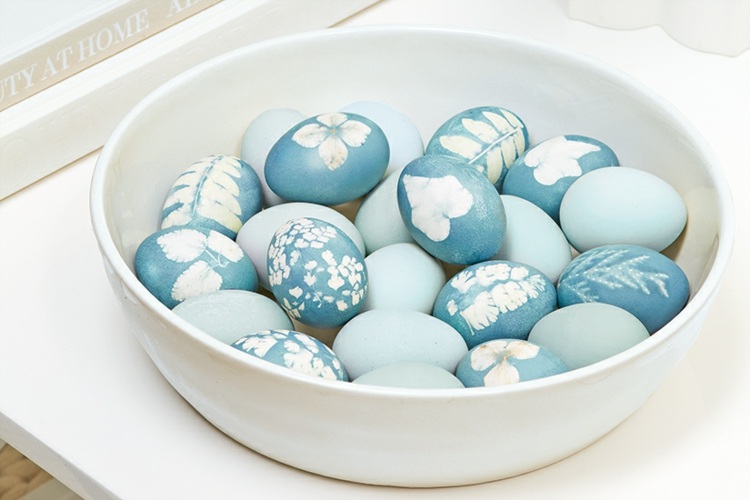
Would you like to dye eggs naturally with patterns, we have the perfect idea for you! Do not only design them with natural colors, but also provide them with beautiful flowers. In the garden you will now have a large selection of beautiful leaves and flowers. If you don't have a garden, just make a detour to the flower shop or a nearby meadow. Something can be found quickly. You need:
- Flowers and leaves
- boiled or blown eggs
- Vegetables for coloring (or alternatively simple Easter egg colors)
- Tights
- optional cord or wire to tie
- Kitchen paper
- vinegar
Take an egg and place the desired leaf or flower on any spot (some flowers will stick better if you immerse them in water). Then put the egg in a piece of sheer tights and tie everything tightly with a double knot or string / wire. Be careful not to let your leaf / flower slip. Boil the vegetables until the water is colored (don't use too much water).
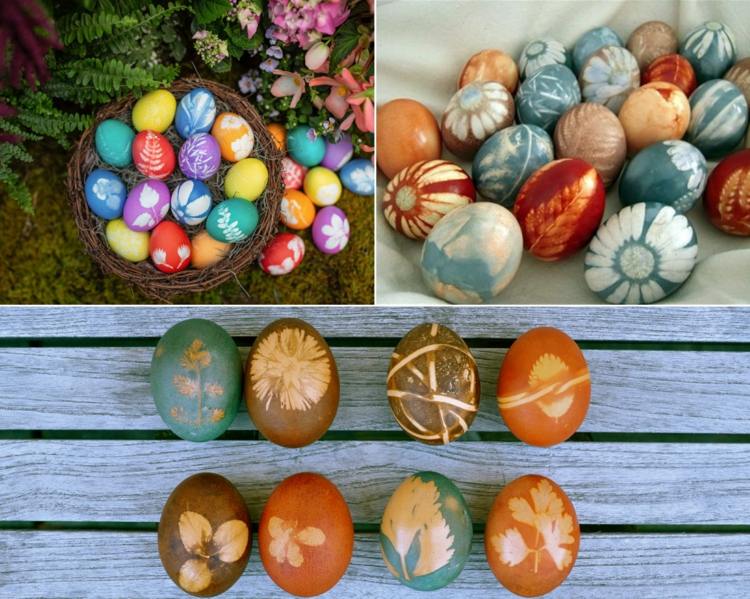
Pour vinegar into the water and boil the eggs for 30 minutes. Then let them soak in for another 2 to 3 hours. Then you can remove tights and plants and you're done. If egg coloring is to be faster, you can also simply use normal egg colors and, according to the package instructions, dye the Easter eggs with plants.
Color eggs with wax patterns
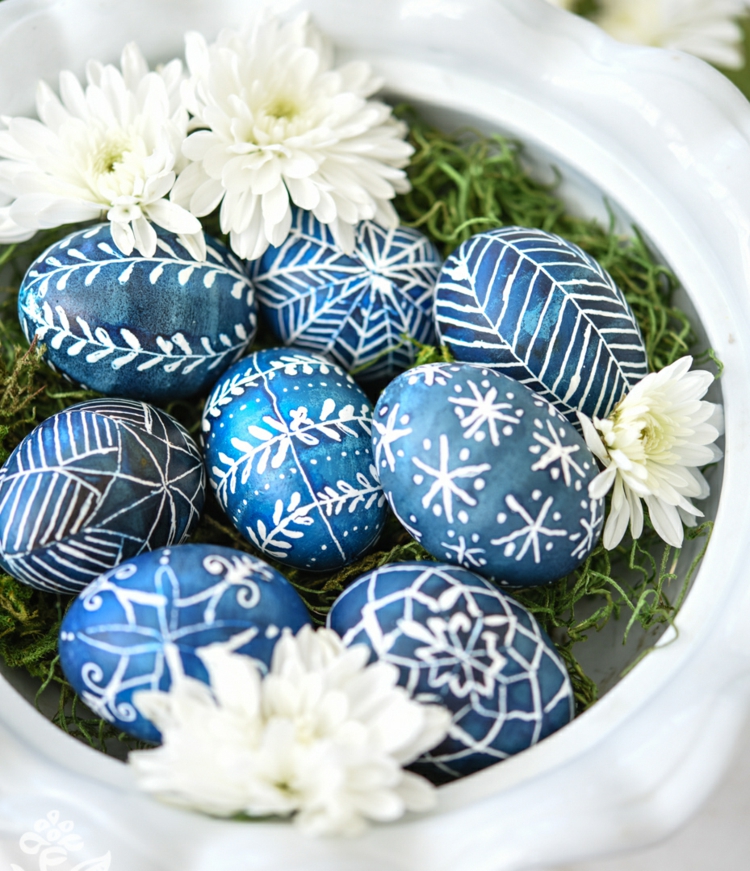
A technique that everyone probably knows but should not be underestimated when it comes to designing Easter eggs motifs and patterns is painting with wax before coloring. If you use wax, you can color the eggs naturally as well as use special Easter egg and food colors. There are now also special wax crayons that are particularly fine and perfect for drawing. But such a tool as in the example below is also very practical. There, wax is placed in the small metal container and heated briefly on a candle flame.
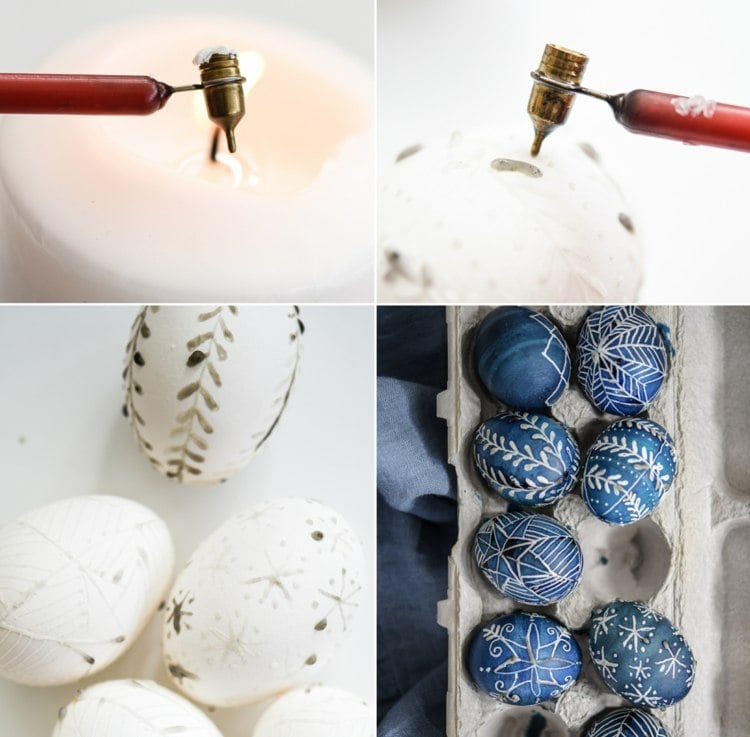
After you have recorded the desired motifs and patterns, color the Easter eggs as usual. Once the paint has dried, you can carefully scrape off excess wax. The special thing about this technique is that you can decide for yourself which patterns to paint. Larger children can also participate. If you use a normal candle or wax crayon instead of such accessories, the eggs should still be warm so that the wax can melt when drawing. But if the egg is too hot, the wax will melt and ruin your wax pattern.
Color eggs with a pattern – the necessary finishing touches

No matter which technique for dyeing eggs with a pattern you choose, the patterns will only really come into their own when you make them shine. How it works? Put a little vegetable oil on a cloth and use it to rub the eggs. But don't overdo it with the oil, otherwise they will become too greasy. Finally, wipe again with a clean, dry cloth and you can arrange them in the Easter basket or Easter basket.
The post How to dye eggs with patterns – 9 ideas with instructions for unique Easter eggs appeared first on Deavita.com | Living ideas, design, hairstyles, make-up, lifestyle, health and beauty tips.


")


