Build your own fountain – refreshing ideas and instructions for your garden
Create beautiful water features with a little ingenuity by building fountains yourself in your garden or on the balcony. There are of course the right ideas and designs from which you can be inspired. The soothing sound of running water has long been a feature of famous gardens around the world. So a fountain not only gives an outdoor area a welcome beauty. Such a DIY project for decorative fountains also ensures your well-being outdoors, which accordingly helps to hide the worries of everyday life. You don't have to look for expensive materials to give even the most modest garden a sense of calm. Instead, you'll find imaginative designs here that will surely delight your guests and family members.
Build your own well
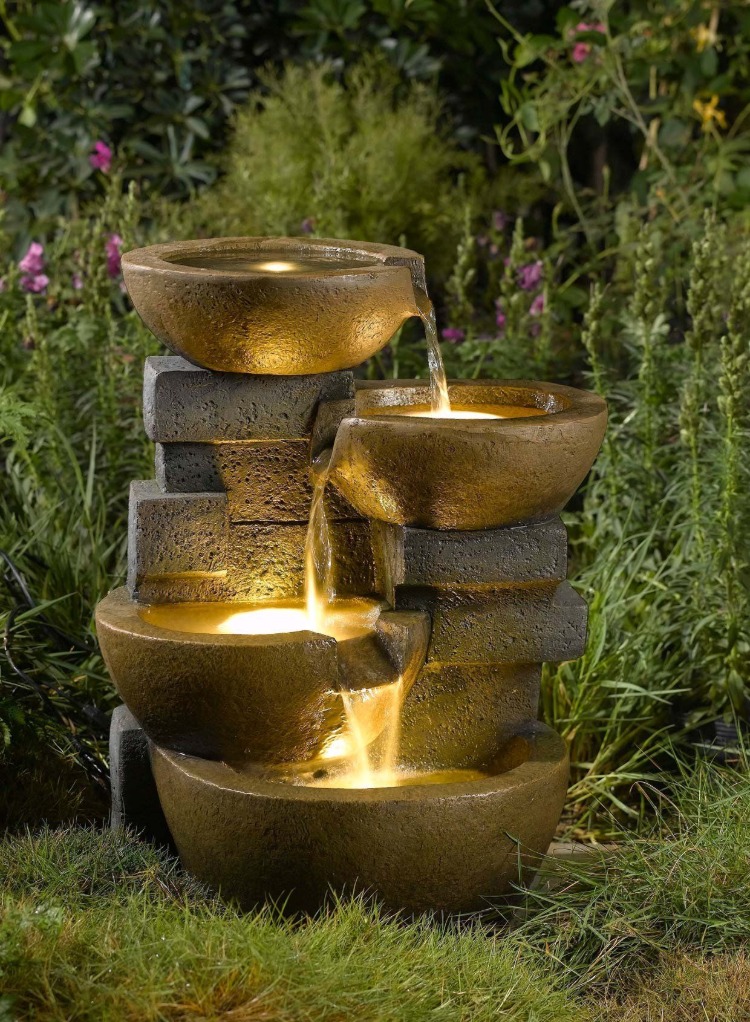
A beautiful fountain, in which water flows down nicely, gives much more life to almost every room. So the idea makes the whole ambience really relaxing and calm. Buying a fountain in the store or installing it professionally costs a lot of money. What can save the day is a little manual skill and reusable materials that embellish your home with the greatest possible charm. Whether you choose to buy an affordable pre-made water feature or want to build your own fountain, you are sure to be inspired by these beautiful features that highlight the most important element of nature.

Statues, vases, waterfall fountains and rock fountains for the garden become popular starting points in the back yard. Just go to a garden center and you will see dozens of options such as DIY garden ponds and pools. Installing a hidden fountain doesn't take up as much space as a waterfall or koi pond, but it does give you the sound of gushing water and a good-looking centerpiece for your landscape.
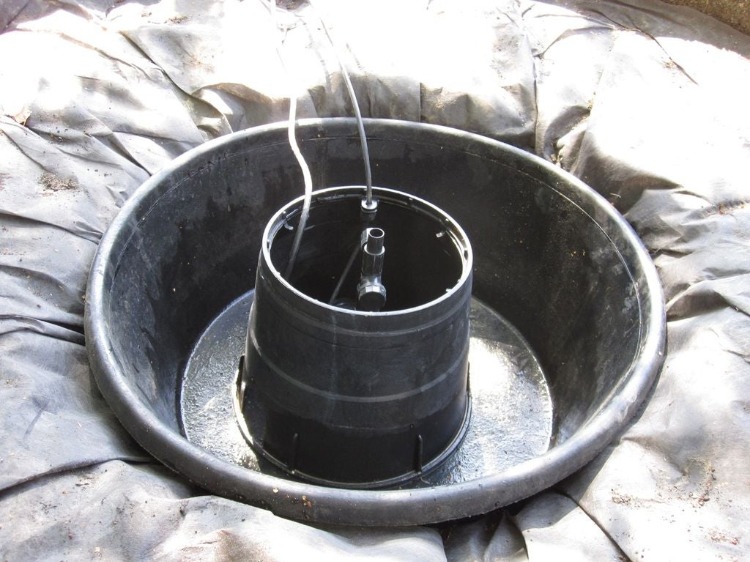
In such a fountain, water is pumped from a reservoir buried in the ground through a standpipe and pumped out of it. The water then flows over the edge of the pool and seems to disappear into the floor. So installing a hidden fountain can be a great DIY project as well as a way to design a patio, pool, or flower garden.

The pre-made components that are required to assemble your own creation can also be expensive at the time of completion. However, if you are building a mini fountain yourself, your goal should be to create it using inexpensive, easy-to-find materials. Depending on your specific needs, you can probably find them for less than $ 100, including decorative stone.
Fountain with a pump and boulders

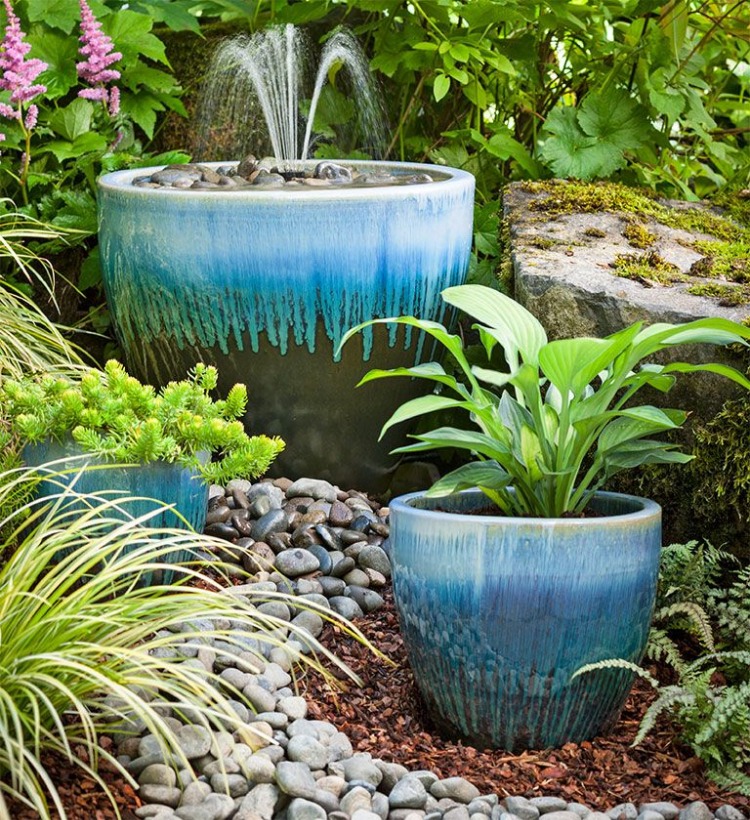
For an almost instant homemade fountain, for example, insert an inexpensive electric pump into a large ceramic or concrete planter. Then fill it up with water and connect it. Place your creation in a bed with low, blooming flooring to highlight your landscape, or install it on the outdoor deck and relax with the soothing sound of running water. The small water basin provides a more environmentally friendly solution and requires less water. This can be a good choice if you have children or pets. So you don't have to worry about them falling into a pond, and you don't have to worry about plants or fish.

First, make sure you have all the necessary tools and materials. The fewer trips you make to the hardware store, the better. Less money on gasoline means more money on the project. Obviously, some of these elements are optional. You use power tools and can decide for yourself whether you would prefer to have safety glasses or an eye patch later. Depending on your desired design and the location of your fountain, the size and quantity of the materials required may vary. The geyser in this example is a fairly simple fountain that shoots out of boulders. This will be approximately 6 meters from the power source.
- Plastic basin of your choice
- Electric pump for garden pond
- PVC pipe 3 cm wide x 3 meters long
- connection
- Sealing cap
- Glue
- Outdoor fabric
- Plastic film or garden bags
- Boulders, cobblestones or decorative stone
- Reinforcement
- network
- Gray primer paint
- Black spray paint
Required tools

- shovel
- Hacksaw
- Pipe belt
- Gloves
- safety goggles
- knee pads
- Chalk for marking
- high pressure cleaner
Make sure you have cleared the area and have all tools and supplies on hand. It is a good idea to test your pump before proceeding. Also make sure that your power cord is plugged into an outlet with the pump. Larger pumps have cables that are 6 or 9 meters long. Since you're mixing water and electricity, it's best if your outlet has a residual current device. The chalk is a great help in determining where everything is going. Flour is a decent alternative to marking chalk if you don't want to spend the money or have pets that you'd rather not expose to chalk. First choose a suitable location to record your rock garden. However, this increases the challenge of laying the hose and the power cord under any concrete.
Build your own fountain Instructions

- Start digging with the shovel
- The stones will need a few more inches in depth of the hole. Also note that you have to remove the dirt evenly over the surface.
- Make the hole for the pool so that it can sit with its top edge at the level of the floor. In this example, the height is approximately 25 centimeters.
- Dig in the power cord if you don't want to run it over the lawn. In this case the power cable is in an electrical cable duct. This is easy to cut with a hacksaw.
- If your fountain is not near an electrical outlet, the power cord is hidden. For a better look without cables and wires, these should be hidden so they don't ruin the effect. It also protects your pump cable from cuts.
- If you ever need to replace your pump, you can simply tie a wire to the power cord and pull it through for your new pump. No digging is required for this.
- Water supply: For example, we have an existing sprinkler system here. You can tap these so that the pool can be refilled every morning when the sprinkler systems are running.
- All the splash water makes it back into the pool if you don't want to refill the pool with a garden hose.
- A high-pressure cleaner is ideal for cleaning a path from dirt and gravel. However, try to keep an installation under concrete as small as possible so that you don't weaken it and cause a crack. Tree roots are a different story.
Next step: connect
- Stuff the hole and the surrounding floor with fabric. This helps limit weeds, but allows spilled, splashing, or rainwater to get back into the ground.
- Place the pump in the middle of the basin.
- Run the power cord to your electrical outlet through the cord when using it.
- Let the pipe run if you use one.
- Try the system. Fill the basin and plug everything in to make sure everything works before you start filling again.

First, build a protective grille for the stones with reinforcing bars and fabric. The rock required to cover an area 1.5 meters in diameter weighs over 500 kilograms. When you lift the stone over your pool, you have more water ready for the pump, but it also prevents the stones from crushing things and gives you some leeway for the pump.
Lay and decorate stones

Of course you can choose any type of stone or cobblestone pavement as floor if you build your own fountain. However, if you do not have a truck or wheelbarrow, you should go to a supplier who will transport it to you. This can cost a little more, but prevents your car from being torn apart and makes it manageable to carry the stone to your fountain area. Place the stones in the middle so that you can ensure a stable position of the stone around the pump itself and sufficient space for the fountain to be sprayed on. Flat stones fit better in the lower layer, while smaller round stones can be used to fill any gaps. In the end, you shouldn't see any floor or support structure unless you look very closely.
Then fill your trenches with dirt or earth. If you have dug under concrete, make sure to put the remains of soil and stones back under it as well as possible. This will help you avoid cracks in the future. When you have set aside the initial digging with grass, put it back. It is best to step on it and pour the whole thing well with water. The fountain grass in the garden will look rough for a while, but will then grow again. Also take into account the long-term electricity costs of your pump. A cheap variant may need to be replaced frequently or uses more energy. Accordingly, this costs more in the long run. You can estimate the cost of electricity to operate a pump using this formula: Amps x Volts divided by 1000 x KWH costs x 24 hours a day x 30.4 days a month = costs a month.
The post Build your own fountain – Refreshing ideas and instructions for your garden appeared first on Deavita.com | Living ideas, design, hairstyles, make-up, lifestyle, health and beauty tips.


")


