Painting lucky stones – what you need, where the trend comes from & ideas with instructions
Are you one of the many people who liked to collect stones during their childhood? If you think back to this wonderful time with a smile on your face, it is probably time to start looking for pretty stones again. Because even more beautiful than collecting on a pleasant walk is the subsequent design of the unique finds. Have you ever heard of the so-called lucky stones or that lucky stones can be painted?
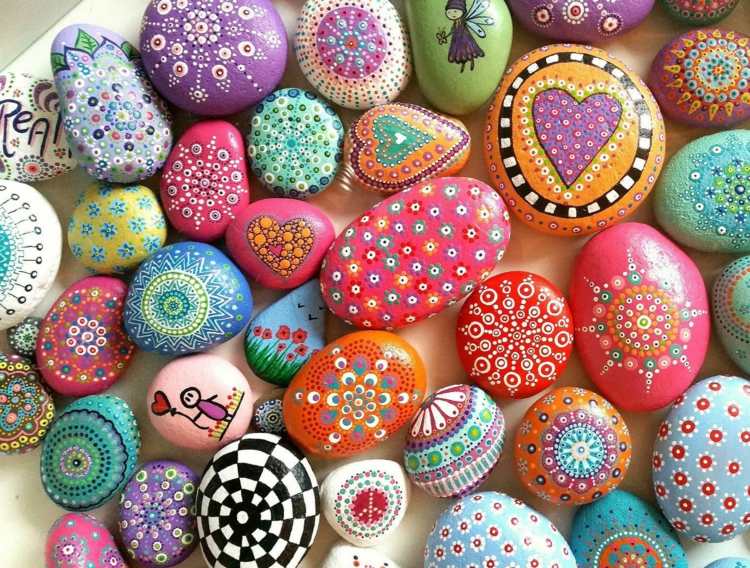
If not, you should make up for it quickly, because similar to mandalas it is soothing and stress-relieving if you design lucky stones yourself. The following lines explain where the tradition comes from, what you can use these personable and, above all, personal good luck charms for and what you need if you want to paint lucky stones.
Painting lucky stones – the trend
Like so many things, the idea of painting stones comes from the USA. From there, the trend reached England and finally Germany. But what is it about? It is simply a hobby in which stones are painted and labeled as desired and with a wide variety of motifs and patterns or even words and then “exposed” somewhere outdoors again. The colored stones should then put a smile on the faces of the founders and may be hidden as well as kept.
There are various Facebook groups in which the stones found are shown. And thanks to the unique motifs, you also know how far each lucky stone has traveled if it was published in the group. An interesting trend that more or less brings people together, albeit on the net and encourages them to collect and do it themselves, give them away and hide them.
And best of all: you don't have to be an artist or have a special talent for painting. There are no rules for the motifs and patterns, so everyone can try it once. Do you dare! Children also have a lot of fun with this crafting and painting idea, so you can choose it for an afternoon together, for a job on a children's birthday party or for kindergarten. Whether for Easter, Christmas or just like that – there are countless variations.
Label stones at weddings
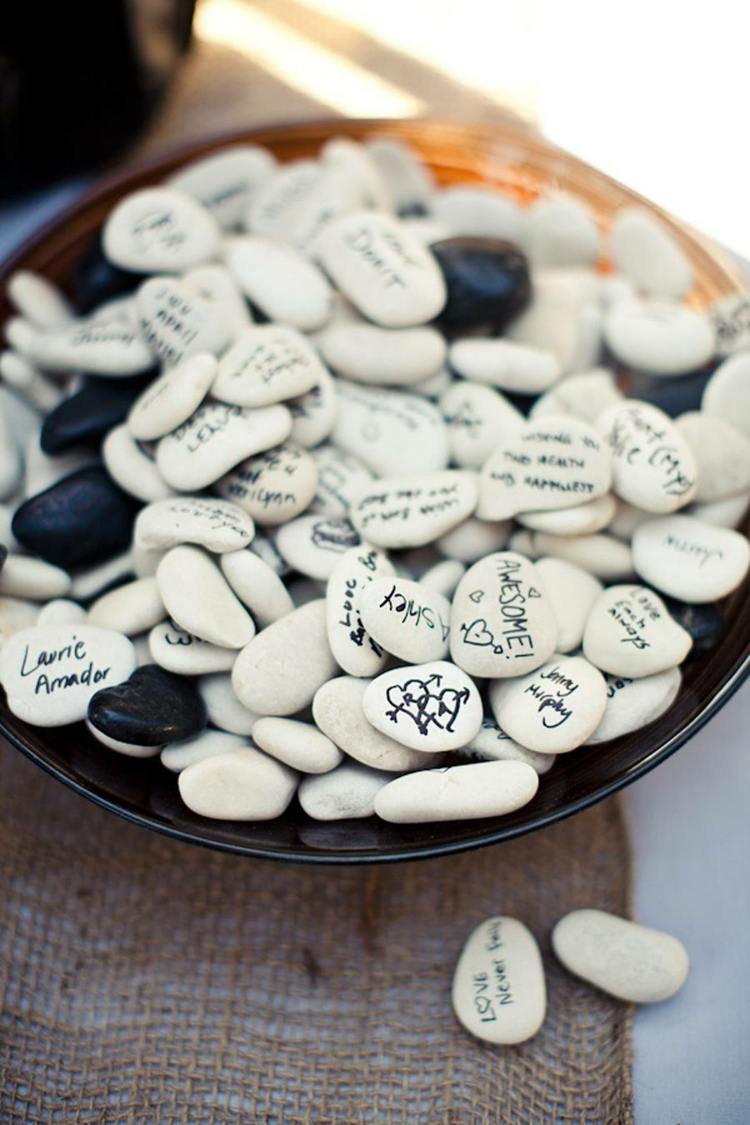
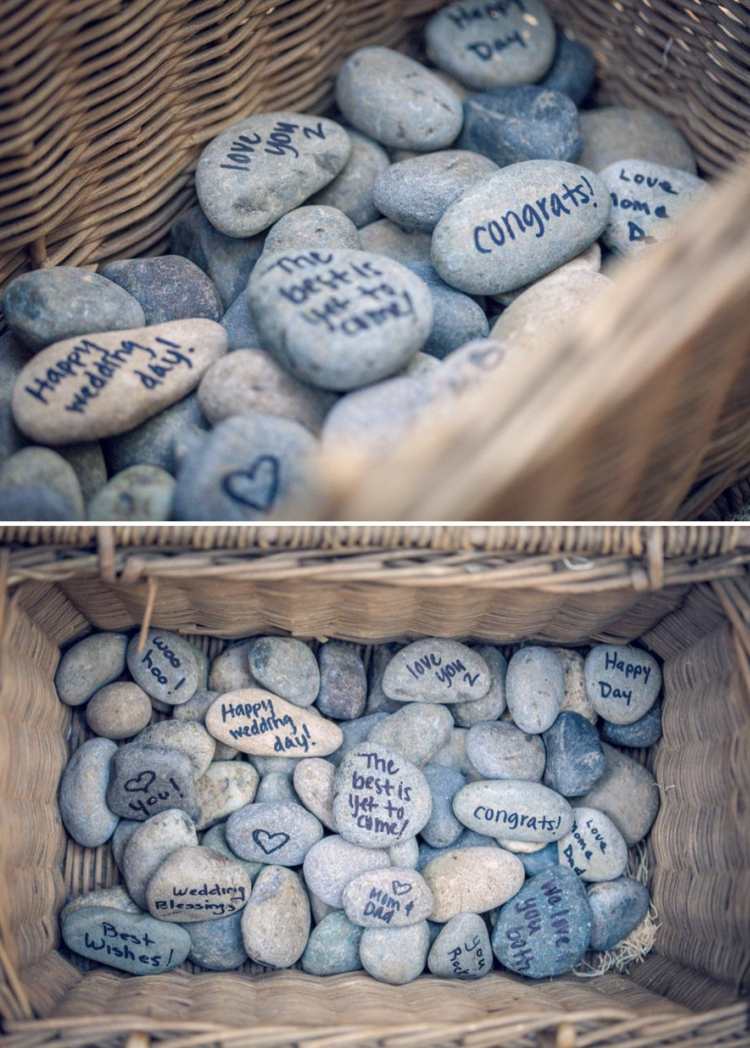
The Irish also have an interesting tradition on weddings. There it is common for the guests to be provided with stones, which they can then label with their wishes. The labeled stones are then thrown into the water to be fulfilled. Since it is a really nice custom, many bridal couples now use the idea as an alternative to the guest book or in addition to it. The guests are supposed to paint stones for the wedding, which the bride and groom will keep as a memory for a lifetime.
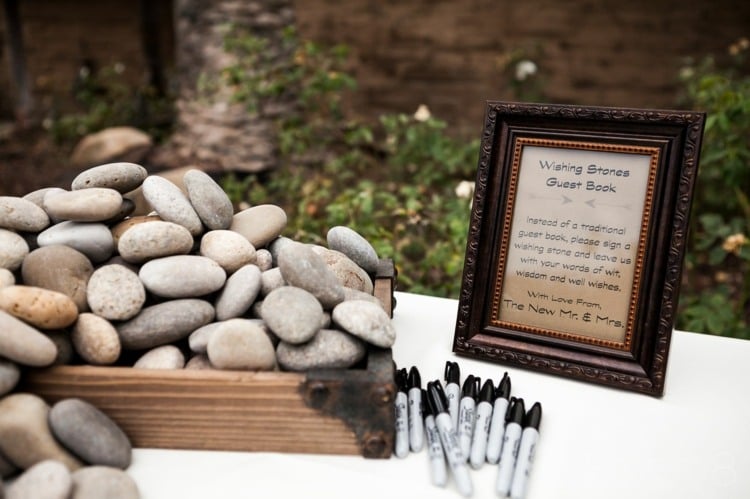
But there is another way to use lucky stones for the wedding: the bride and groom can paint lucky stones themselves in advance and then use them as party favors. For each guest you can come up with something very individual and personal, or you can simply write on your name and the date of the wedding. In any case, the lucky charm will be a great guest gift.
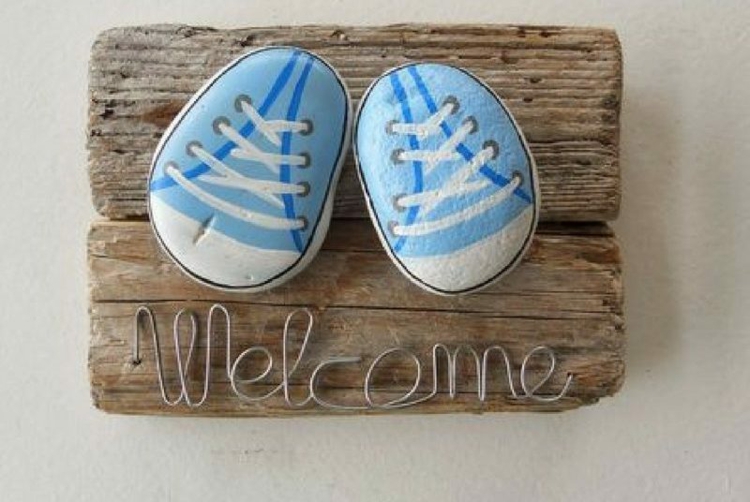
Lucky stones to give away
In general, such lucky charms are a really great gift idea. Everyone can use a little extra luck and since our society is often superstitious and believes in good luck, you will surely get a hit with the gift idea. If you make the lucky stones yourself, you can adapt them wonderfully to the occasion and, above all, the person and thus make them a particularly great pleasure.
But how can you paint lucky stones, which colors and pens do you need and are suitable and which motifs fit best?
Painting lucky stones and labeling stones – which pens and colors?
Although there are very good opaque colors these days, if you are not sure whether yours is one of them, you can play it safe and paint the pages you want to paint for the lucky stones white. This is how you ensure that the colors come into their own and shine beautifully. Simply use white acrylic paint and brushes for this purpose or white wall paint. Once the white background has dried, you can make the lucky stones yourself by painting and labeling them.
It is best to use acrylic paints for painting. You can thinly sketch the desired pattern or motif in pencil beforehand. A touch-up pen is well suited for labeling or drawing contours. Especially if you want to finally seal your work with acrylic varnish or nail polish, you should not use a waterproof fineliner, as it will dissolve again due to the varnish.
Additional items can also be useful when painting lucky stones. Simple ear sticks and toothpicks are suitable, for example, for dots, straws for small circles, or the edge of cardboard for straight lines. With a sponge, you can in turn make smooth transitions from one color to another by carefully dabbing on the colors.
Making lucky charms out of stones – instructions and inspiration
For all beginners, we now have a few simple instructions that you can use to paint, label and design beautiful lucky stones. There is also an original idea with sheet metal that you are guaranteed to fall in love with. In the video you can see how a beautiful mandala can be drawn. All stones should be cleaned in advance and then left to dry well. Have fun copying and be creative!
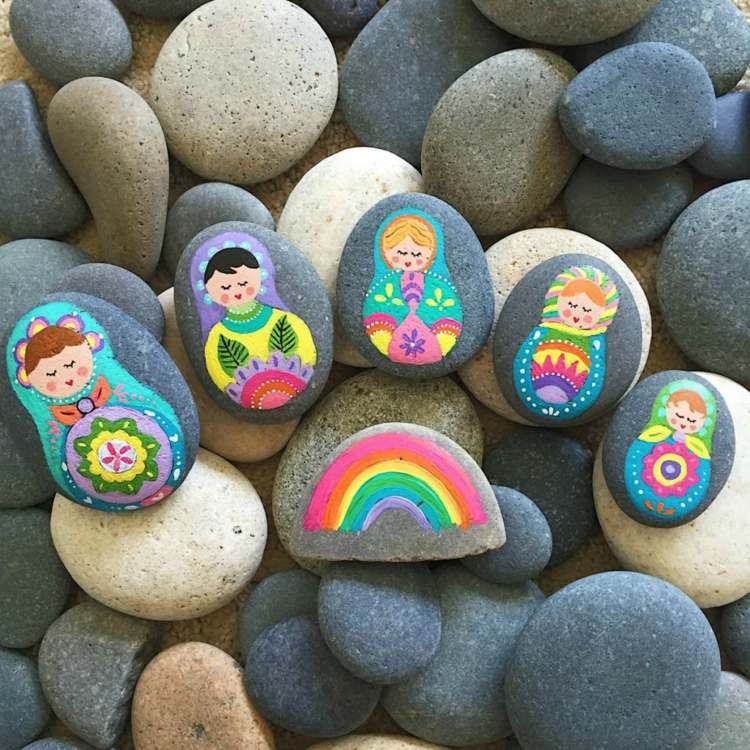
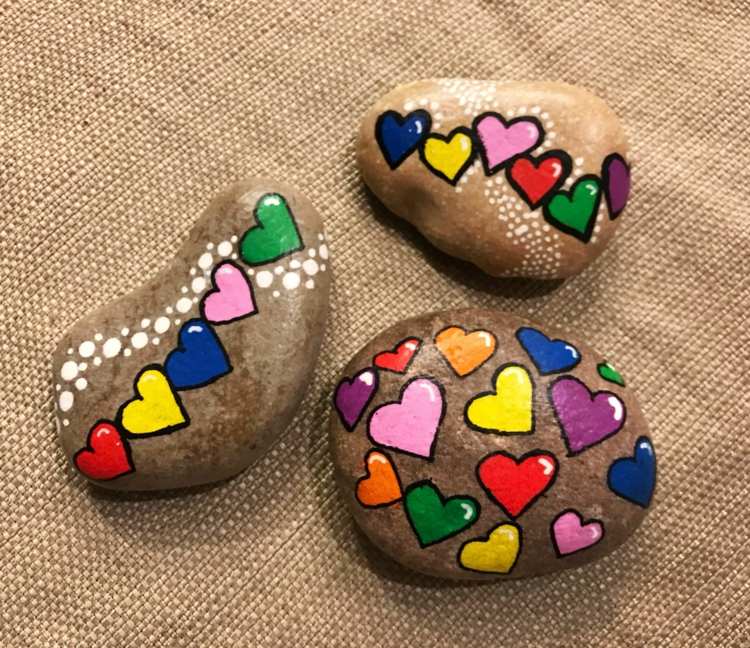
Paint lucky stones – rainbow with tree
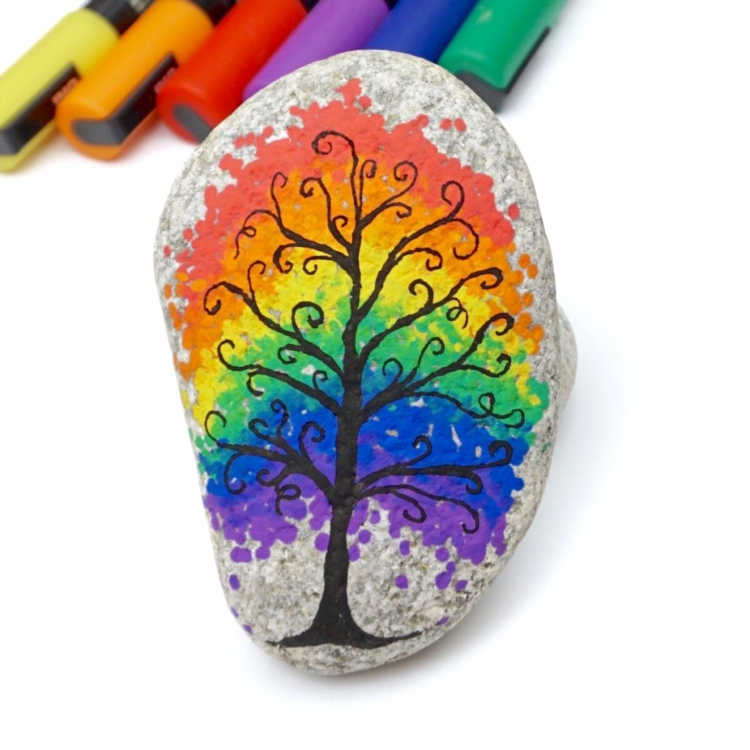
- POSCA marker
- Stones
Start painting the rainbow colored stripes with dots on the stone. First, the points should not be too close together. Only dab here and there so that you can split the stone better and more evenly. Don't forget to leave enough space for the tree trunk in the lower area. If you use this brand of pencils, only press very lightly, otherwise the spots will get very wet and dry slowly.
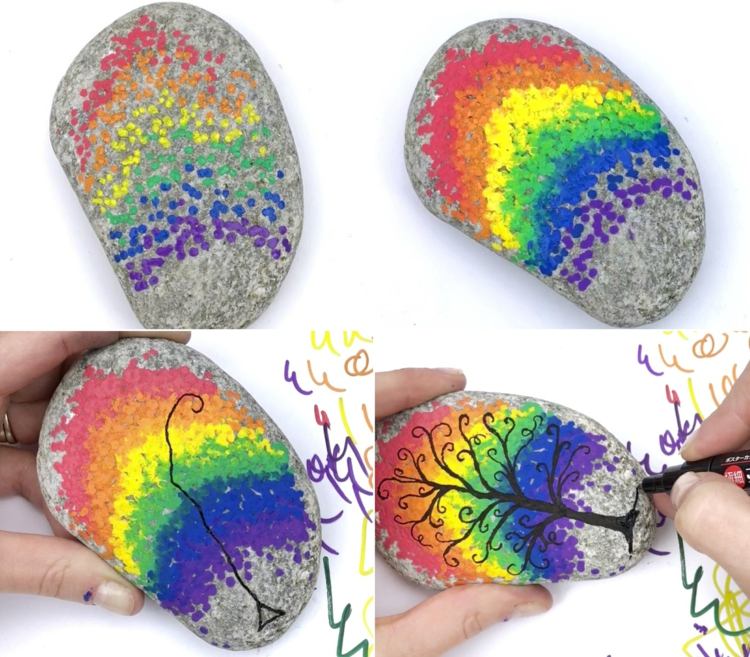
Once you have marked the rainbow stripes, you can add more dots and draw them closer together. Also, let the different colors blend into each other by overlapping the dots at the edges. The paints should now dry well before continuing with the tree. With a suitable, thin fineliner, draw a triangle at the bottom of the free area and start drawing the branches to form a triangle from above. At the bottom, let them get thicker. Finally, extend the side corners of the triangle and paint it out.
Pebbles with a marble effect
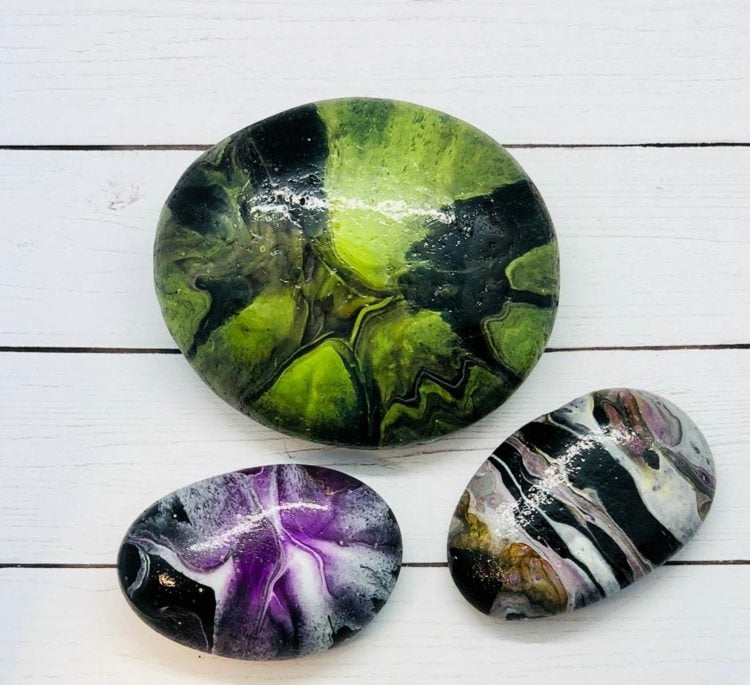
If you find this design so beautiful and want to paint lucky stones in this way, you only need acrylic paint and a few other things. How you mix the colors for such purposes and what other materials you need, we have already explained in another article.
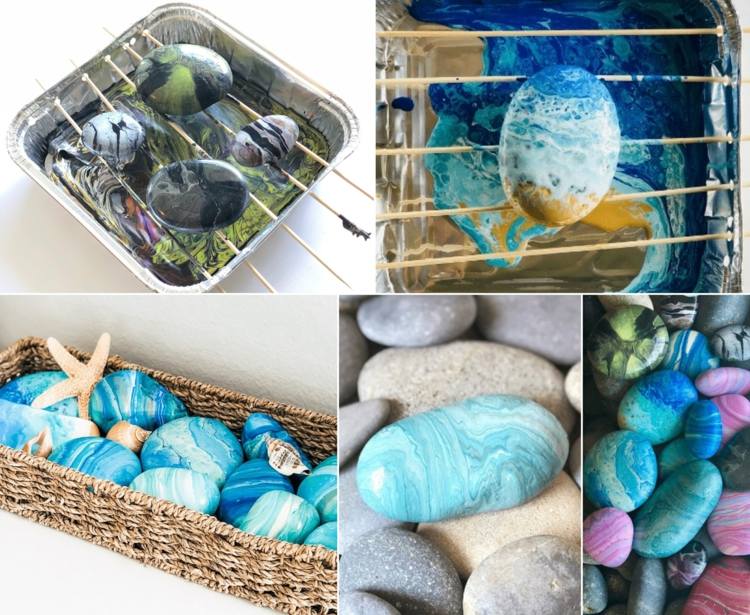
Just follow the instructions there (you can also leave out the hair oil for the stones), except that you mix the colors in smaller quantities in a paper cup. Spread shish kebabs on a disposable plastic bowl (like a grill), place the stones on top and pour the ready-mixed paint on them. After painting lucky stones in this way, you can not only give them away as gifts, but also decorate flower pots and flower beds in your home and garden. It is best to seal your design with varnish.
(youtube https://www.youtube.com/watch?v=-95PvFVWQRk)
Painting stones as a lucky charm – transfer printed motifs to stones
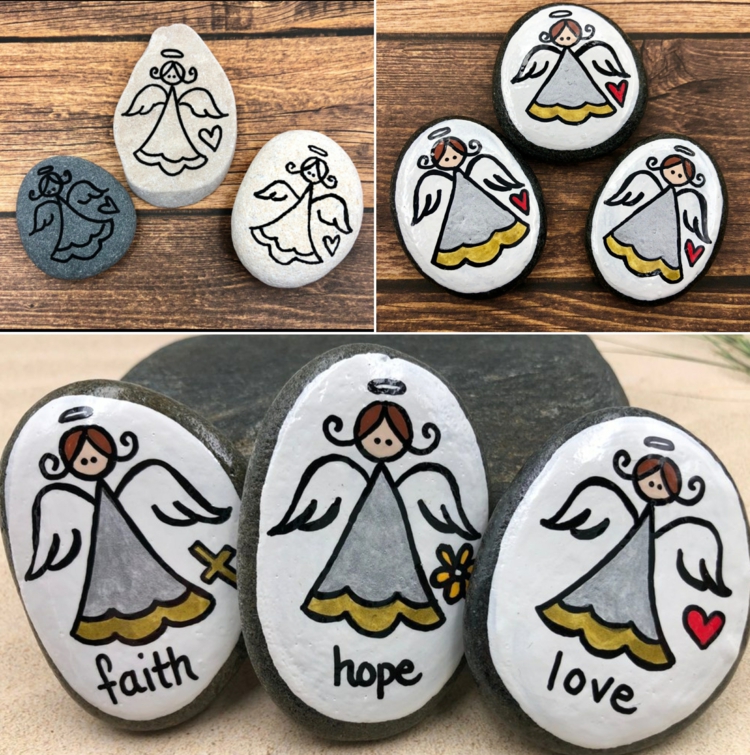
In the picture above you can see really simple angels that you can also paint yourself. If necessary, you can also print out an angel (or any other motif) and transfer it to the stone with tracing paper. It works like this:
- Place the tracing paper on your template and pause the motif.
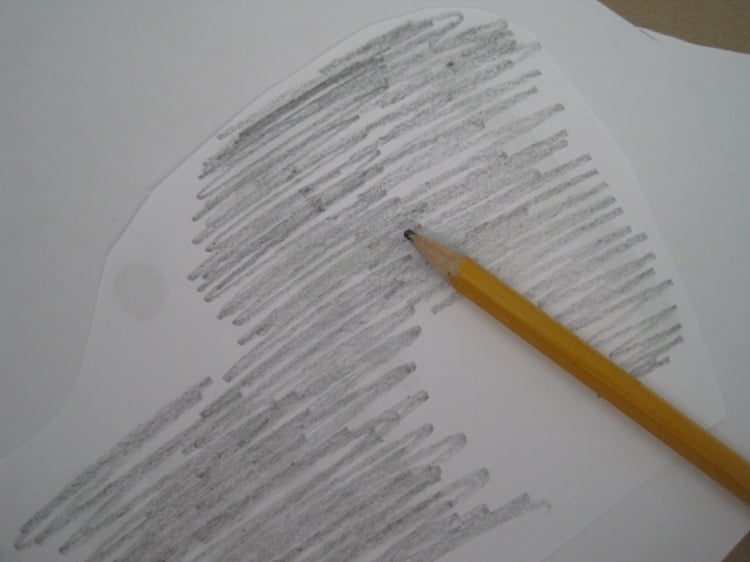
- Turn the tracing paper over so that the motif is facing down and rub over it with a soft pencil.
- Place this page with the scribble on the stone and trace the motif again with a hard pencil. The particles of the scribbled side are transferred to the stone.
- Draw the motif with a suitable fineliner (e.g. POSCA).
Once you have transferred the motif, you can design it as you like with acrylic colors. Pretty gold was used for the angels.
Paint simple sheep
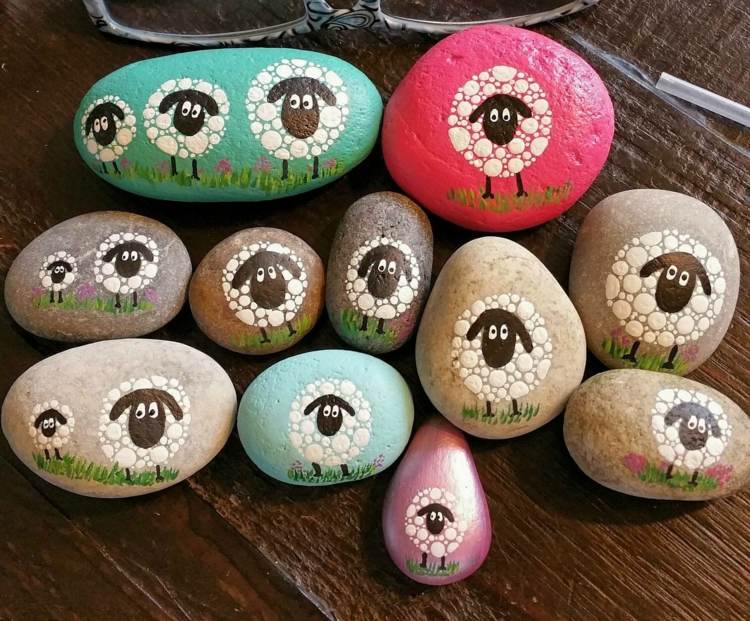
How about such cute sheep? First paint any background (if you want) and, once the paint has dried, put a head on the stone. Let this dry too, whereupon you paint the sheepskin on the pebble with white dots of different sizes (don't forget your eyes too). Finally, a few legs are added. If you like, you can also paint the lucky stones by adding grass and flowers.
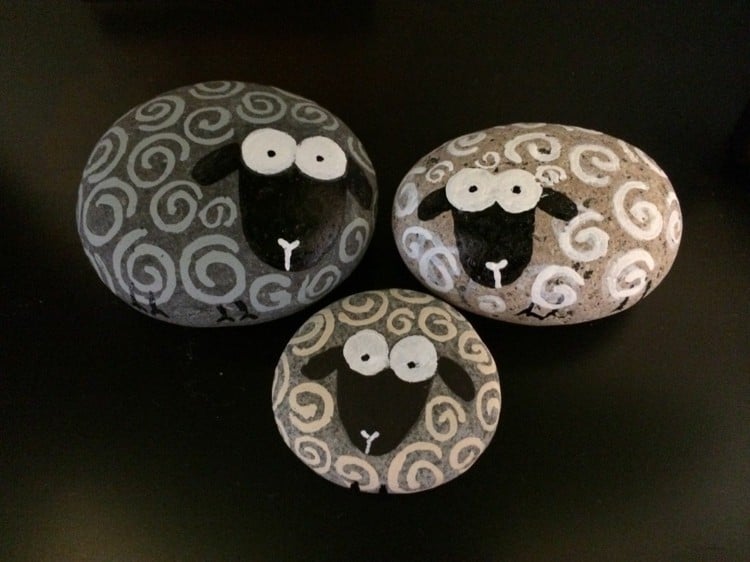
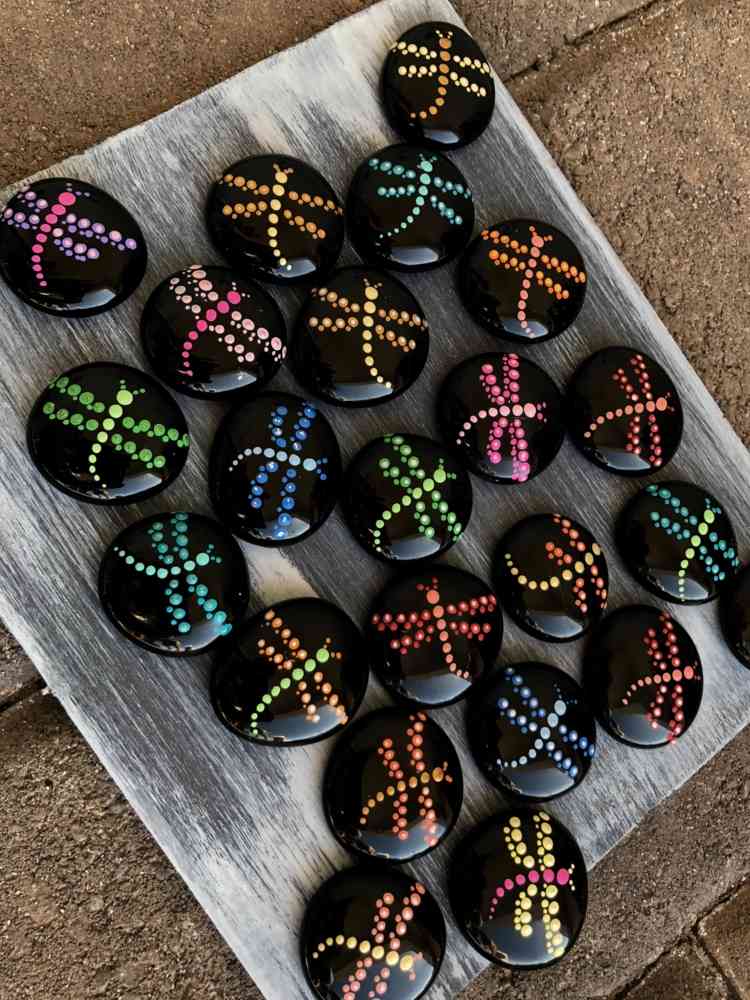
You can create even points with simple things from the household. You can get big points with the eraser of a pencil, medium-sized ones can be painted with cotton swabs, and especially small ones with the pointed side of a colored pencil or pencil (you can then wash off the paint and continue using the pen normally) or with toothpicks. Small spirals can also be painted instead of the dots.
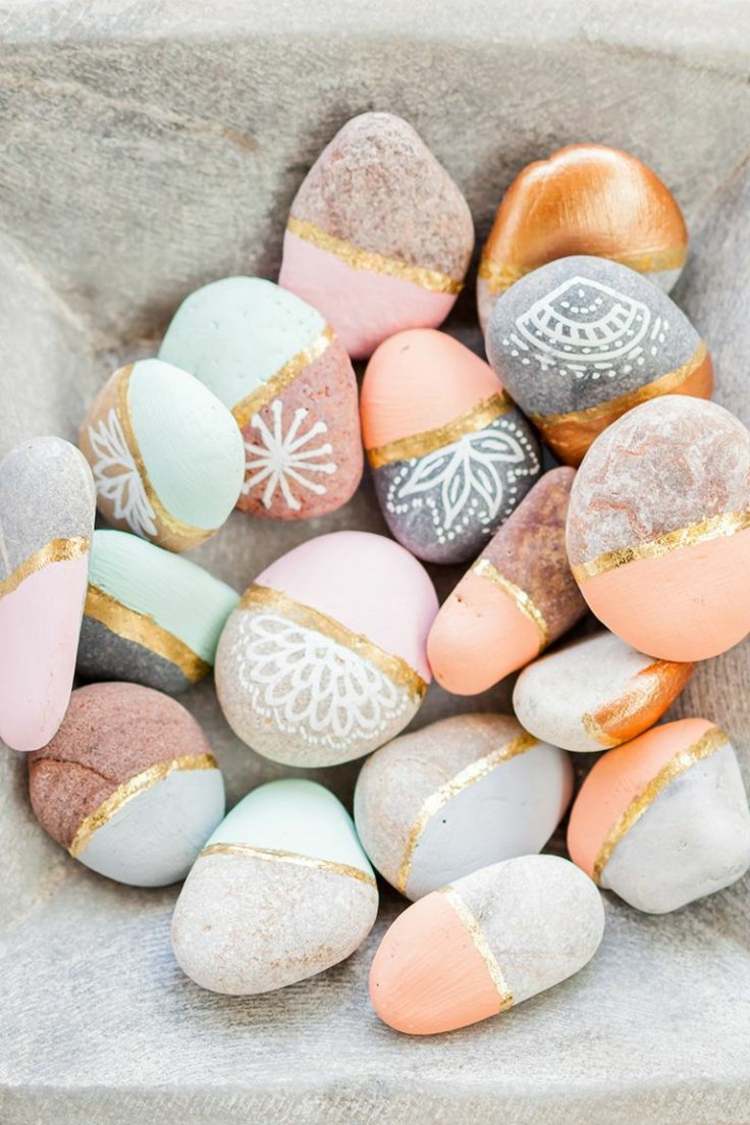
Bring gold leaf and copper leaf on the stones
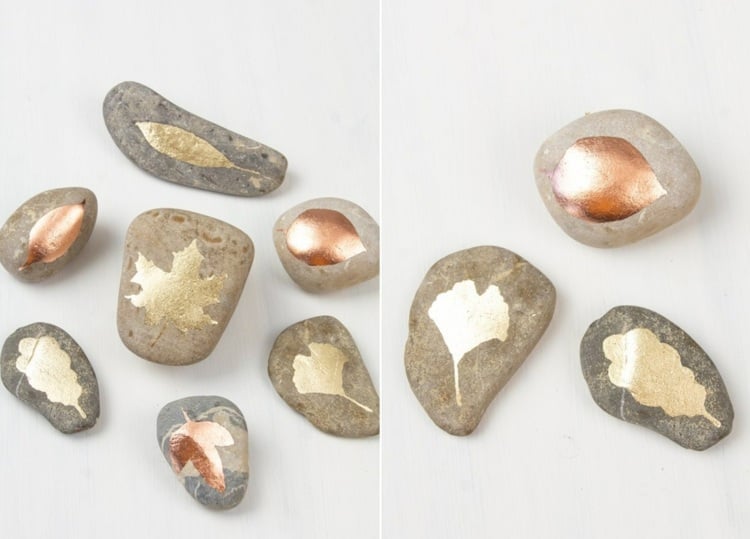
Although leaves were chosen as motifs in the example, you can of course think of other silhouettes. Just make sure that it is a motif that can also be recognized afterwards. Hearts, stars, flowers and many other things are ideal. It is best to prepare a stencil if you do not dare to draw the motif yourself. Print out the image, cut it out and transfer it to the stone by tracing the outline. Otherwise you need:
- Sheet metal, e.g. Gold leaf, silver leaf or copper leaf
- Sheet metal adhesive (contact milk)
- Clear varnish for sealing
- several brushes
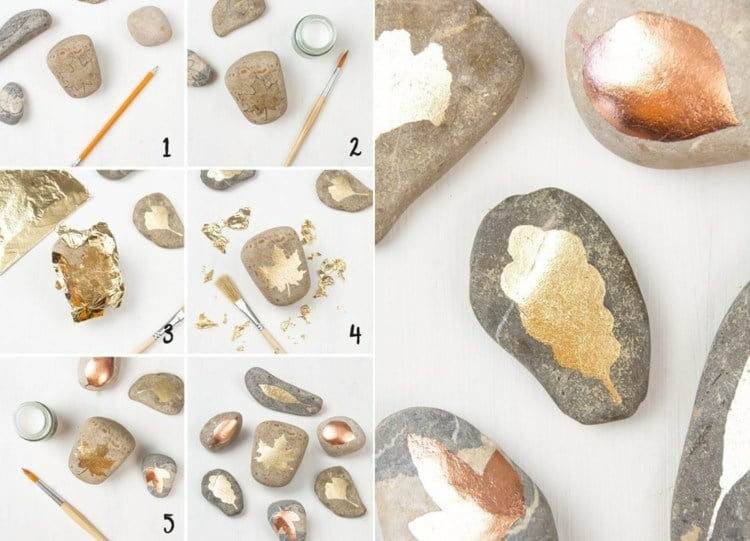
If you want to make these interesting lucky charms, you should, as already mentioned, first draw the motif on the stone with a pencil. Then paint it with the glue and lay the sheet metal over it. Then use a dry, thick brush to brush over the sheet metal to press it onto the glue. The part that is not on glue should fall off. If not, carefully pull it off by hand.
If your motif gets cracks or holes that you don't like, you can fill it with small pieces of sheet metal. Then seal the stone with the clear lacquer and let it dry well. Tip: Your motif will look even more interesting if you combine two types of sheet metal.
More ideas as inspiration and to imitate
Blend colors with sponge
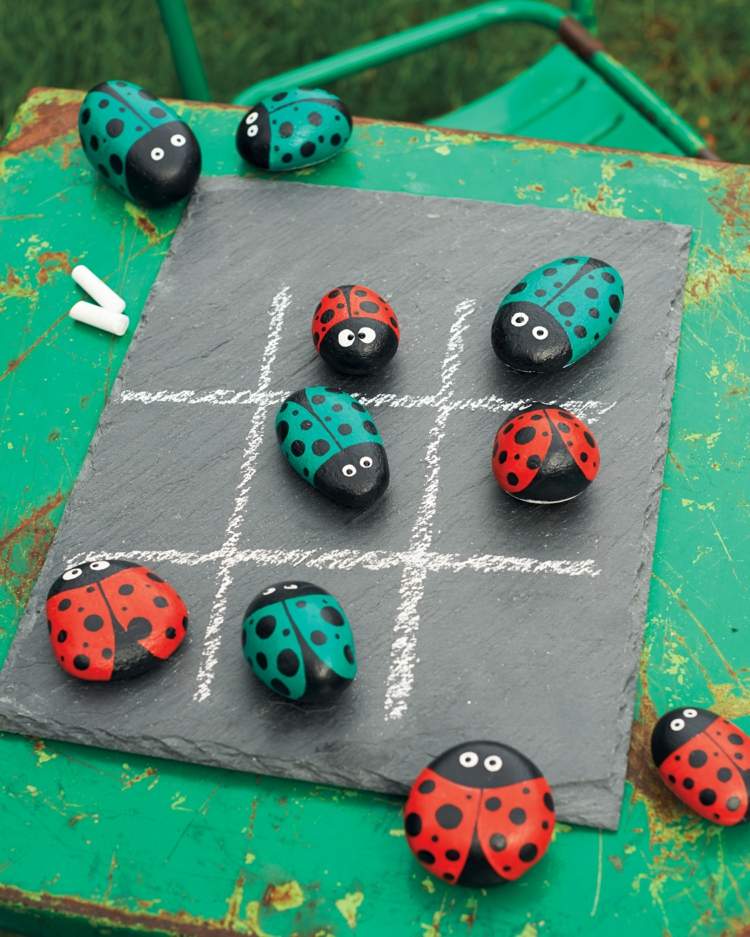
Make games out of painted stones – ladybugs for Tic Tac Toe
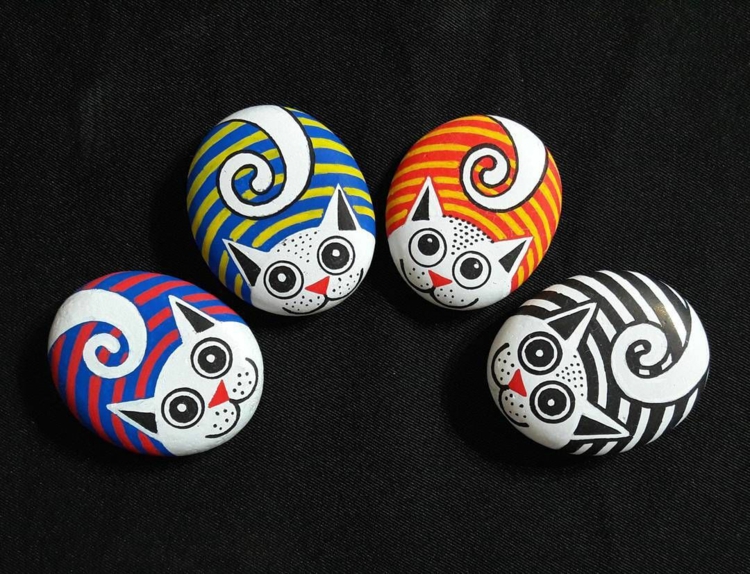
Striped cats
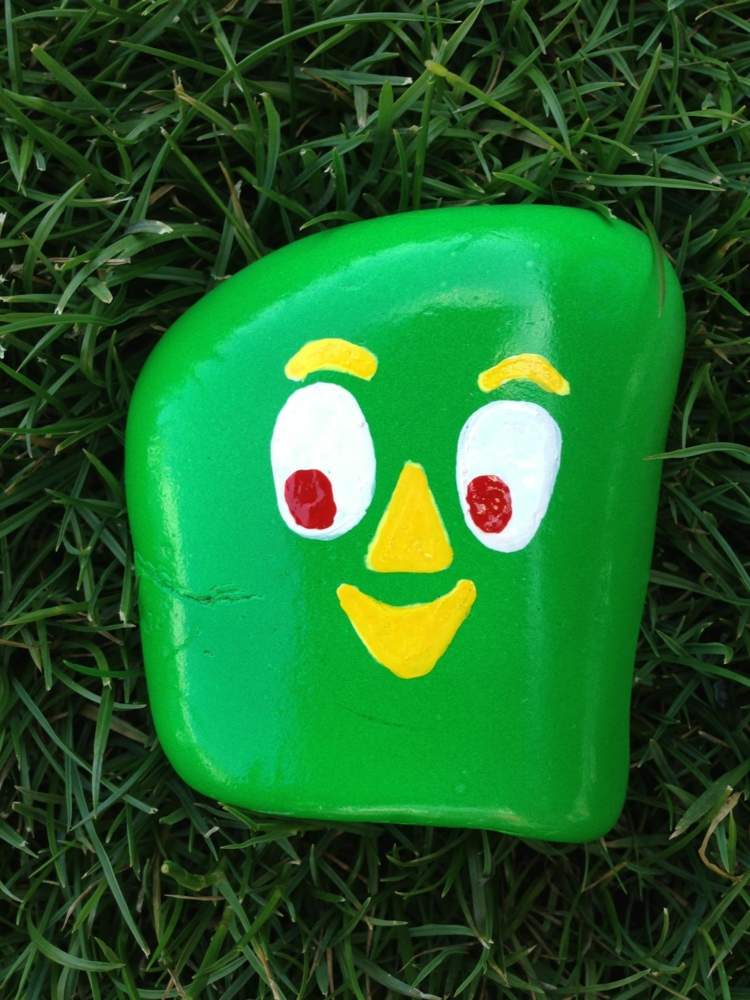
Funny green face
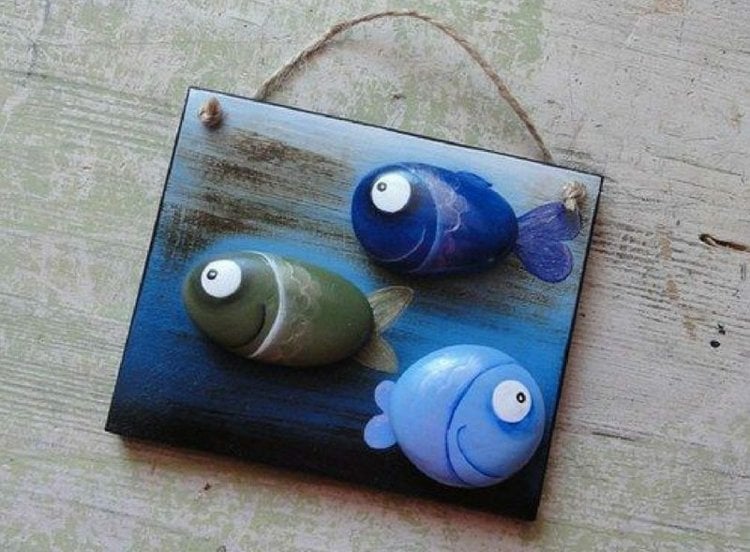
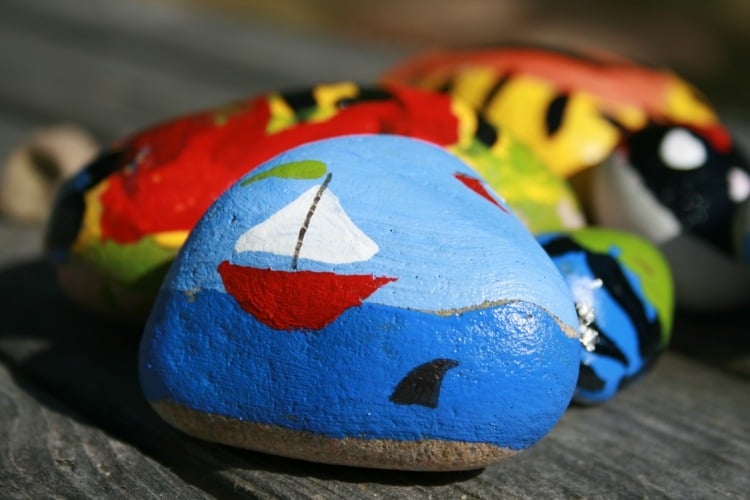
Sailboat in the sea
Painting lucky stones with children – superheroes as a motif idea

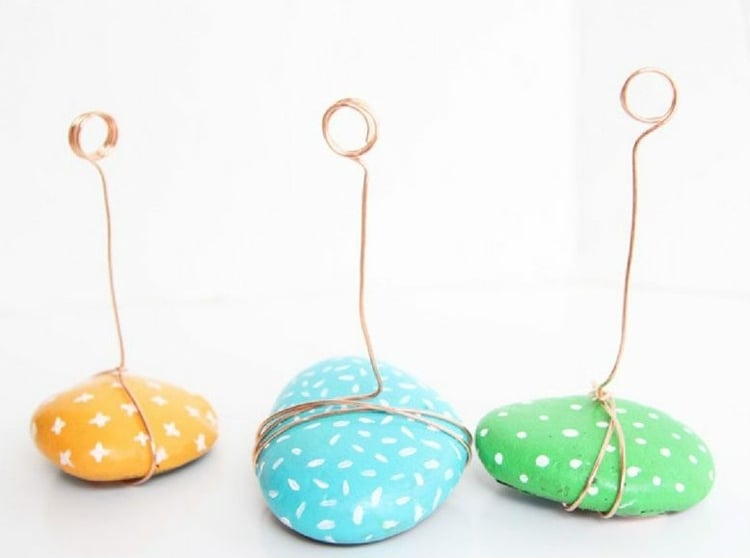
Make photo stands out of painted stones as gifts
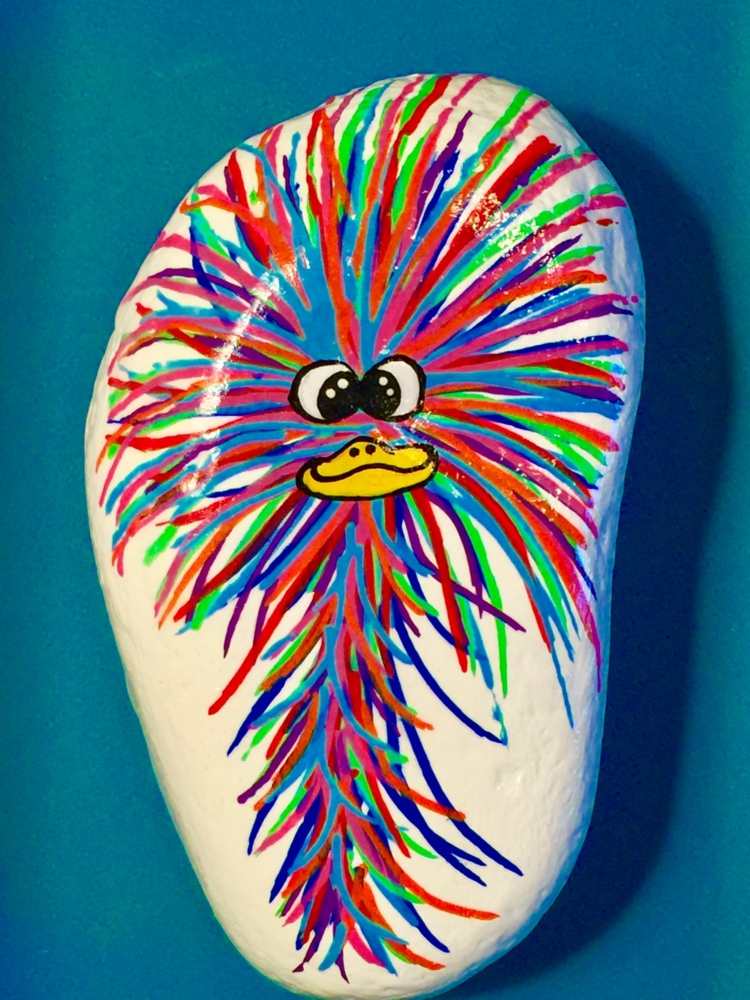
Funny bird with colorful feathers
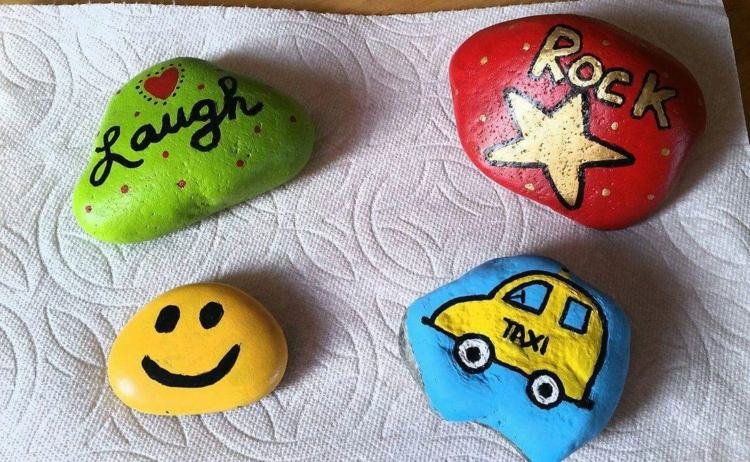
Stones painted by children
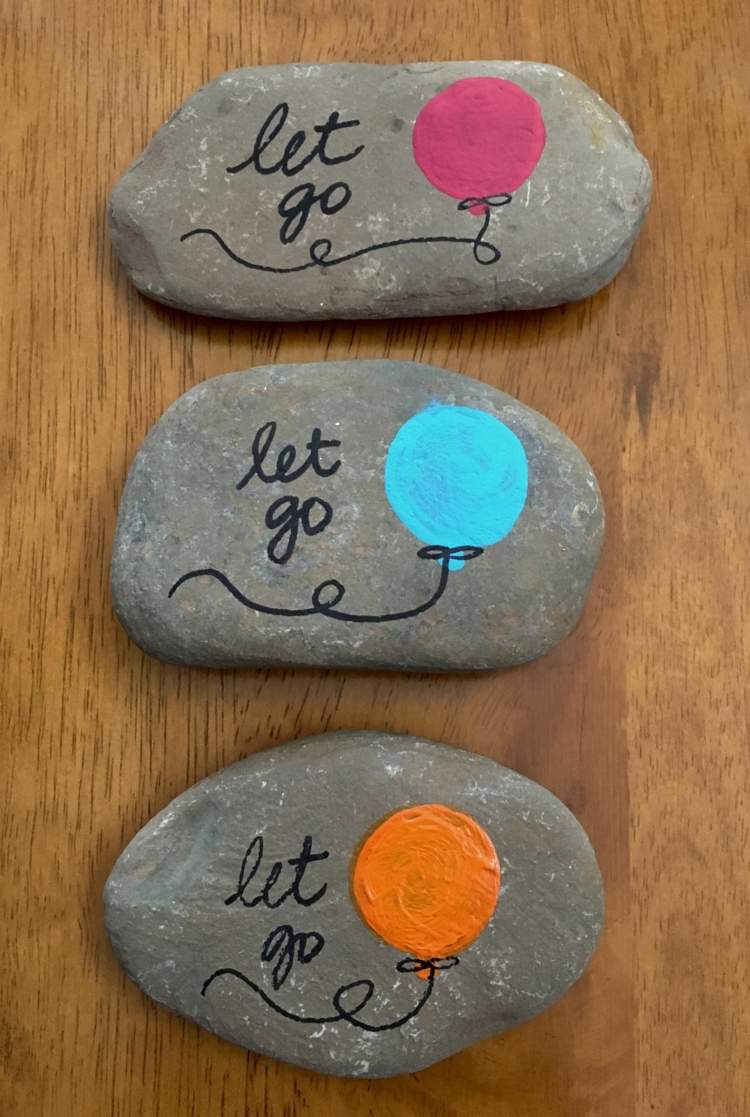
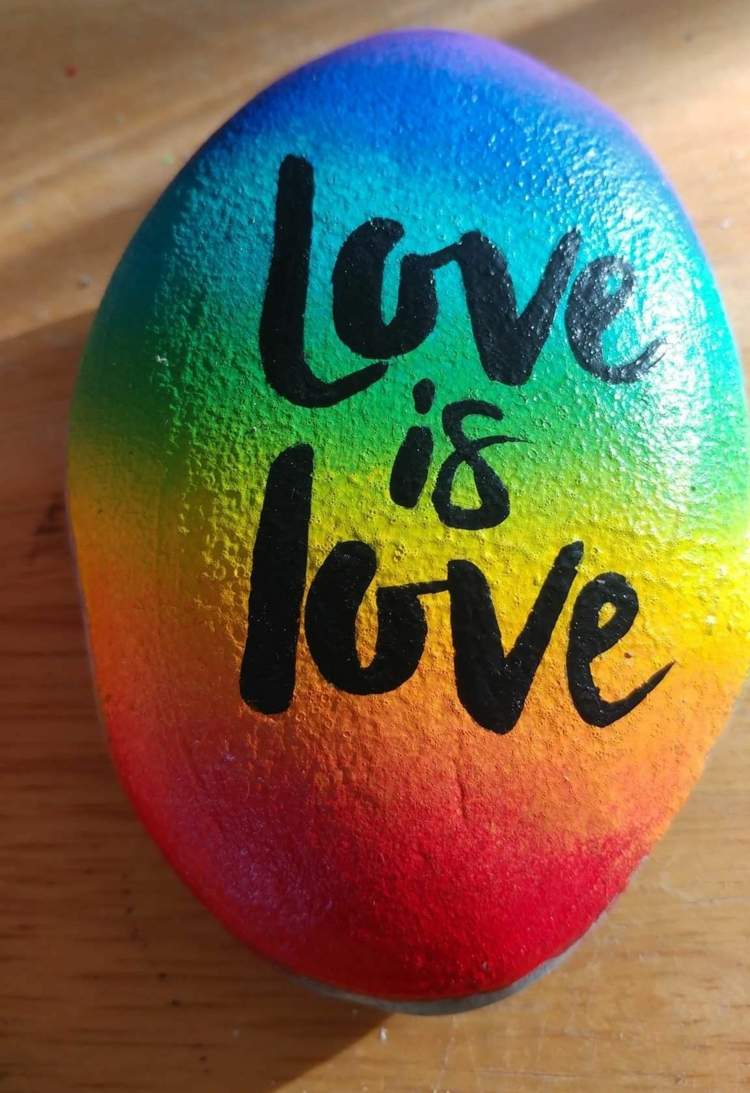
Label stones – sayings and wishes
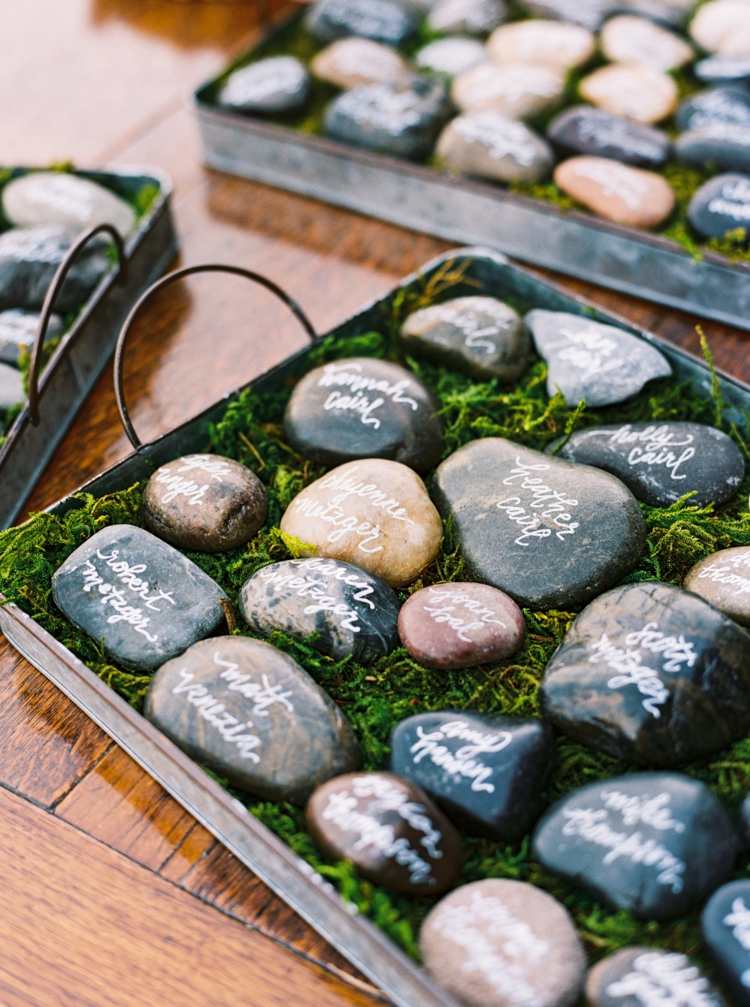
Signatures of the guests of a wedding
(youtube https://www.youtube.com/watch?v=k7u7O5dkoxA)
The post painting lucky stones – what you need, where the trend comes from & ideas with instructions appeared first on Deavita.com | Living ideas, design, hairstyles, make-up, lifestyle, health and beauty tips.


")


