Laminate and wall adhesive - Ideas for creative wall design with floor coverings
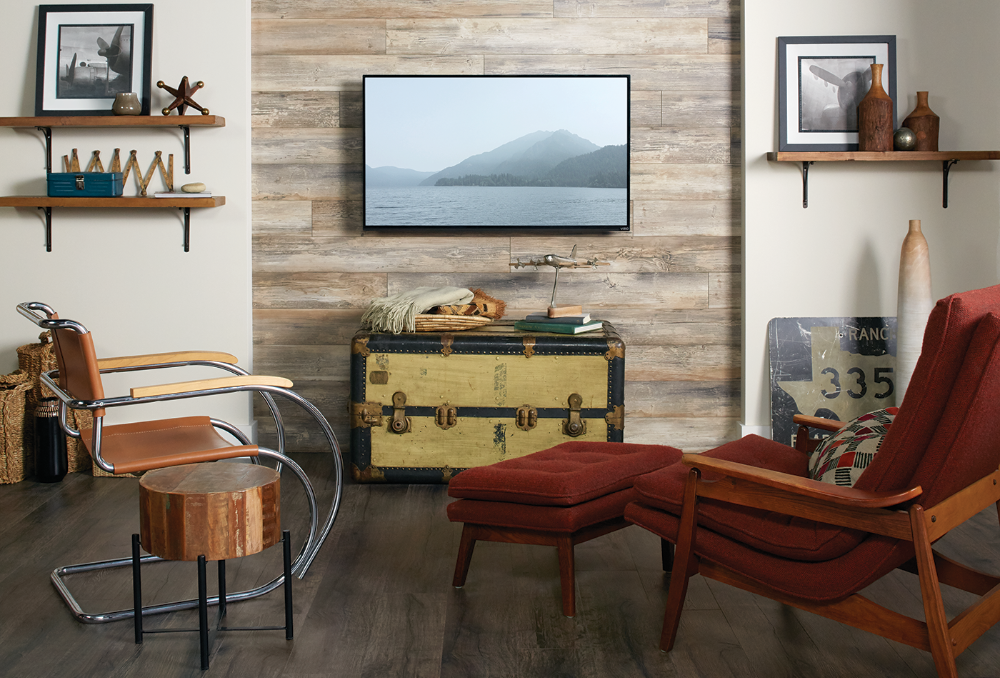
If you enhance your space design in a creative way and way, you can stick laminate and wall. Laminate parts facilitate installation and are currently a hot trend in modern wall design. So it's no surprise that accent words are one of the hottest DIY projects ever. They are stylish and provide a great opportunity to add space and texture to your space. In recent times, homeowners and designers have continued to pursue this trend by using wood and laminate in wood optics to realize similar projects.

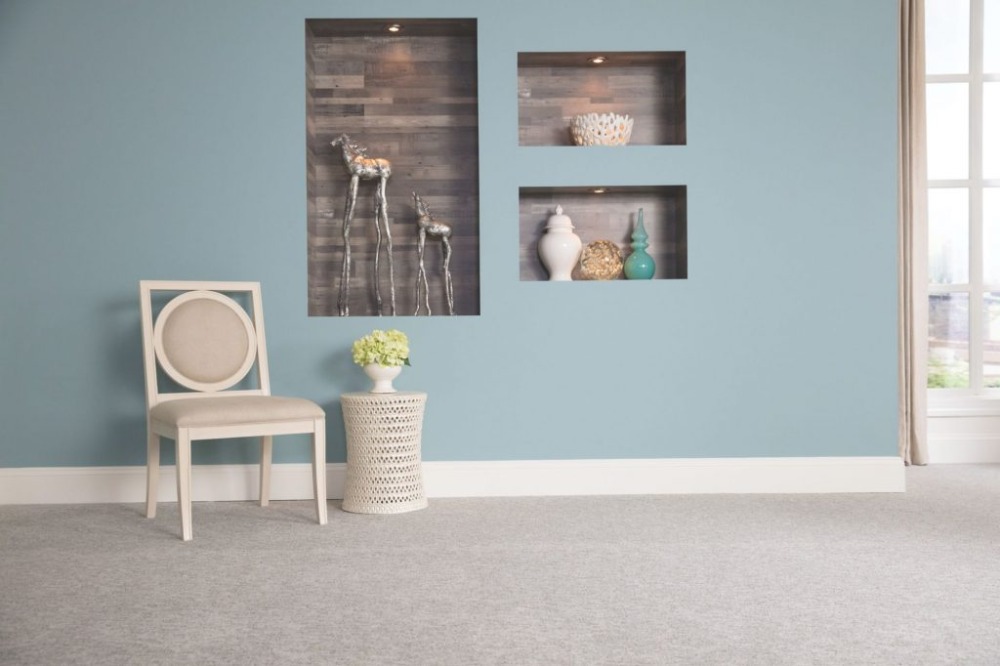
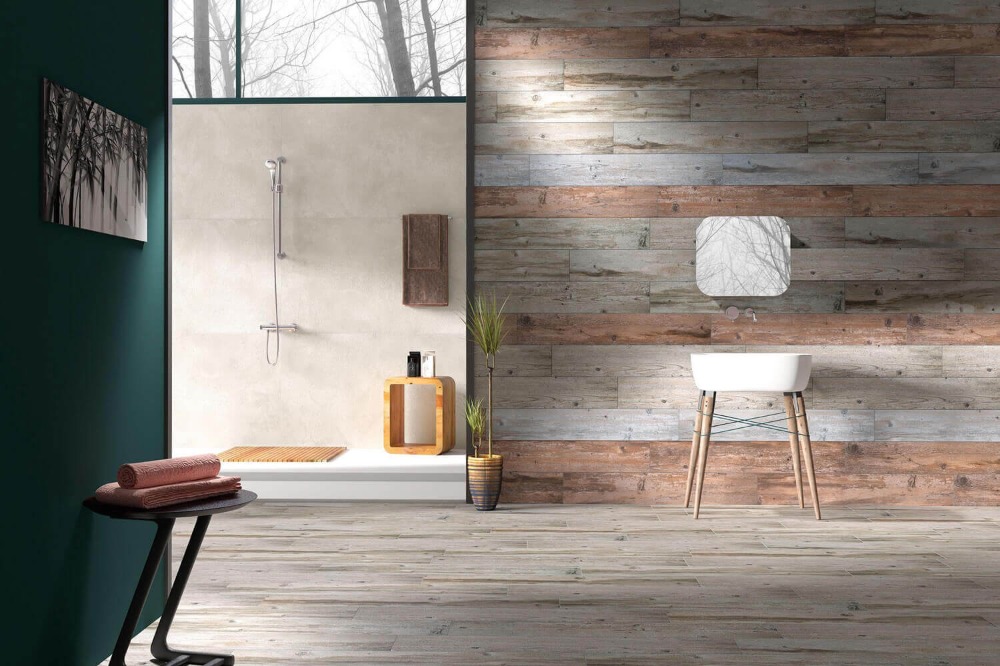
Although in this article we mainly treat the use of laminate as a wall covering for private households, until the transfer of the application also on commercial surfaces. Whether you are warming up your lobby or reception area, add a little more detail to your bathroom or create an effective wall for your company's awards - the possibilities are limitless.
Stick laminate in wall

Accented walls with this floor cover are not only creative and striking, but also easy to install and wait. For a fraction of the cost of hardwood, you can sometimes achieve the desired effect. And if we're easy to install, then we think so. With some planning, a few tools and a little effort, you can create your own beautiful accent wall in the afternoon. Can you stick vinyl laminate to the wall? This is certainly an opportunity, yet as optics does not offer the same homogeneity as a solid material.

First, decide on the look you want at home. Choose a color palette for the space and the wood type that fits your style. If you are interested in a recycled wood look, you will have a look at the collections that are on the market. If you still want something very special and textural, you can decide for the individual creation and choice.

As soon as you have the perfect wood-look-inspired design, it's time to let go and you can stick the laminate to the wall. The wide variety of species and color palettes make the laminate perfect, in order to create a stylish atmosphere, a traditional look or additional elegance. Impressive textures and wider parts provide nothing but an authentic, satin wood look, lent spaces and a sought-after look.
Proceed with the project
The wall design with laminate is best suited for transitional applications or for creating a structural or colorful contrast. Make sure that the wall surface is completely level. Laminate parts are perfectly processed and show up in the wall with shy unevenness. When repairing irregularities, scrape a plywood board (as thin as possible) into the wall to install laminate walls. To install a TV or other object, first screw a plywood board into the wall and then attach the laminate parts. Sometimes you have added support for the screws that carry the weight. In the first line, read the instructions for installing your accent wall. You can usually find a guide to the original mounting of laminate on the packaging.
It is important, however, that before the installation, you follow some simple steps to ensure that the wall looks great and lasts for many years. Before you begin, check to see if your wall is clean, dry, safe and vertical, as well as meet all of the exact building regulations. You can, for example, adhere the laminate with silicone to the wall, even if you do not have anything on the available wallpaper or coatings. Do not install the laminate in blankets, worktops, or as construction materials, but do not own them as materials. The placement in sloping walls or surfaces, which are not at least 90 degrees perpendicular to the floor, is certainly not recommended. Did you note that you are responsible for all maintenance of all the building regulations, including the maintenance of the required distance to heat sources such as fireplaces.
Sticking laminate into wall - instruction

Overall, the installation is pretty easy. They need a simple, glossy wall that is free of wallpaper or disguises. Your wall may not be longer than 12 meters and not higher than 4 meters. And before you start, you have to wax your laminate parts into the room for 48 hours before you apply them. So plan two days in which you will stick the desired laminate in wall. These must be placed in the appropriate room in which they should be installed. Your room climate should also lie between 15 and 27 degrees Celsius for optimum installation. It is therefore quite similar to the installation of Bodenbelag from laminate parts on your floors. They also need a few tools to do the job right. You can find these at your local tree market or at any larger supermarket:
- Hammer
- Stroke and train rods
- Screw electric screwdriver or drill bit
- Three litters, voices (to remove disguises)
- Nail gun or bolt shotgun
- Nails without a head
- Trockenbauschrauben
- Silicone Kleber
- Quad bar staff molding
Embarrassed by laminate in the wall

- To attach the parts horizontally in the wall, you first select so many of them that the first row in the wall lies. Lay each laminate part with the decorated side up and down the groove to the wall on the floor. Measure the length required to adjust the range horizontally. Now you have to mix them together.
- First, make sure a distance of at least 6 mm to the wall is provided at both ends. After installation, you can add appropriate quarter bars to cover the gap.
- As soon as you have the panels connected, turn them around as the decor page is pointing down. It's time to add the glue. Just wear a silicone bead in one "S" pattern on any laminate parts.
- Then gently push the parts against the wall. If you do, with a water scare, make sure that the first set is complete and that all end connections remain square and firm. Hit a nail with the groove in any wallpost. Put the dry scrubber just near the bottom of this first row in the wall bolts. They have installed the first line of your accent wall.
Repeat the process

- Then start next with the second and all subsequent rows on the right side. In this case, keep in mind a single dispensing of 20 to 30 centimeters for each new row. They should make sure that your wall looks natural, not all parts are perfectly aligned. The second board of the second row and any other must be changed before installation. Remove the short end by turning it three to four times with a universal knife. Attach S-pattern to the non-attached parts and fit them into the first row.
- Use the knock block to bring the parts into position, and then hit a nail by the extended section in each wall post to attach it to the wall. Close the process until you reach the ceiling. Be careful, your boards continue to tumble.
- First, cut all parts in the last row to the required width to close the installation. End the process in the same way as in any previous series.
- Finally, use your quarter bar for the interior and along the blanket to cover the expansion gaps and achieve a finished look.
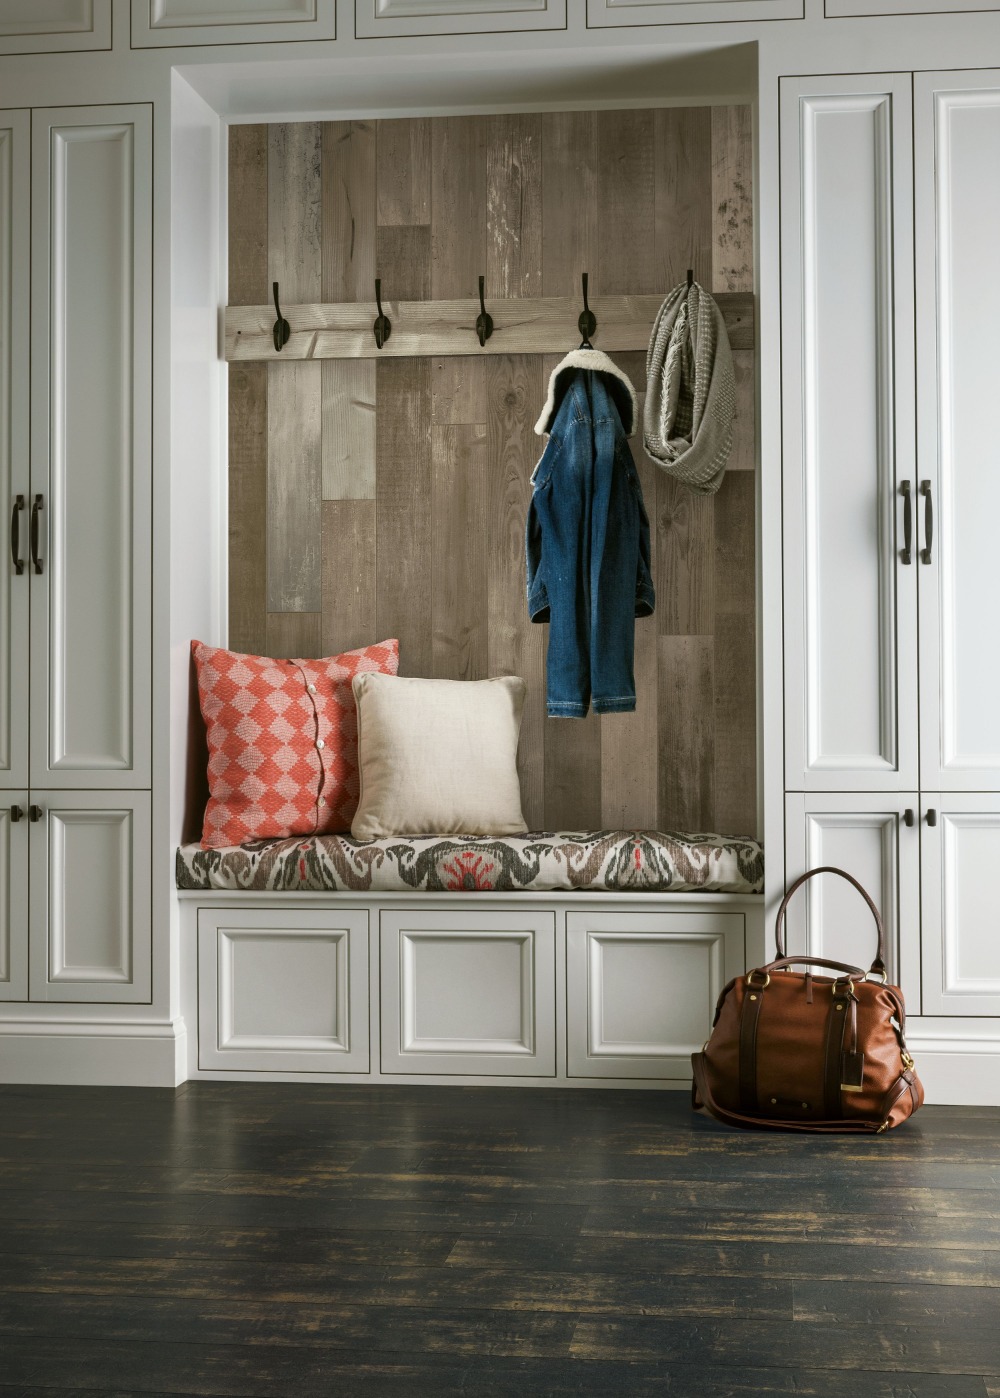
- Now just dust off with a microfiber cloth and already the accent wall in wood optics can come to fruition. Hanging a few photos, a few shelves, so it lies entirely in you. They can adhere the laminate to the wall by positioning it vertically to achieve a classic wood trim.
Further useful tips

So the most popular trend in laminate flooring was actually nothing to do with the flooring itself. More and more people, from homemakers to high-end designers, embarrassed laminates and walls. If you suddenly have a look at the wood-laminated walls of your grandmother, you wait for a moment. Since Omas Tag has changed a lot in the Fußboden industry. For one, this material looks more realistic than you used to. There are so many designs on the market that fit all trends and fit every style - traditional, weathered wood, multi-width parts, contrasting variations and muted neutrals, to name just a few.
Stylistically speaking, there are not as many possibilities as now available in the laminate. It looks real and even feels real. So opt for a vintage look with textured parts or for the sleek modern with smooth surface. A laminate floor has provided such a long road. It is easy to install, manageable, robust, durable and easy to clean. These are properties that you desire, regardless of whether the so-called artificial wood is lying on your soil or in your walls. Discover many creative possibilities, how you can put a big statement in your home with a little effort and materials.

So horizontal or vertical DIY laminate walls can be successfully created with little skill. It only takes one afternoon and there are so many different options to choose from. You can try it out as well as try out the extra parts as well as some lightweight and polished ones. With so many color and text options, you are sure to create an accent wall that is just as unique and stylish as you are.
The post adhesive laminate and wall - ideas for creative wall design with floor coverings appeared first on Deavita.com | Home ideas, design, hairstyles, makeup, lifestyle, health and beauty tips.


